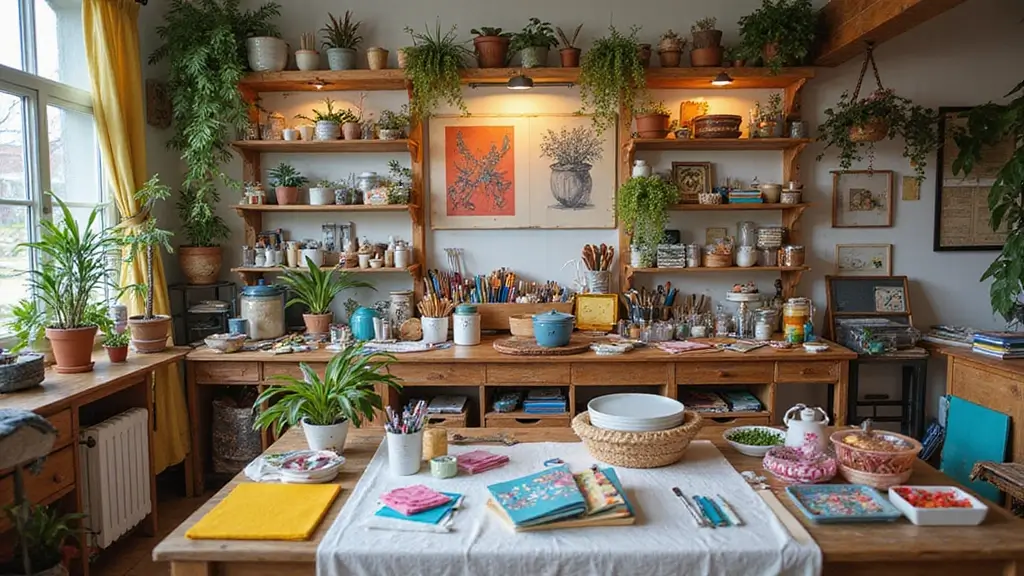
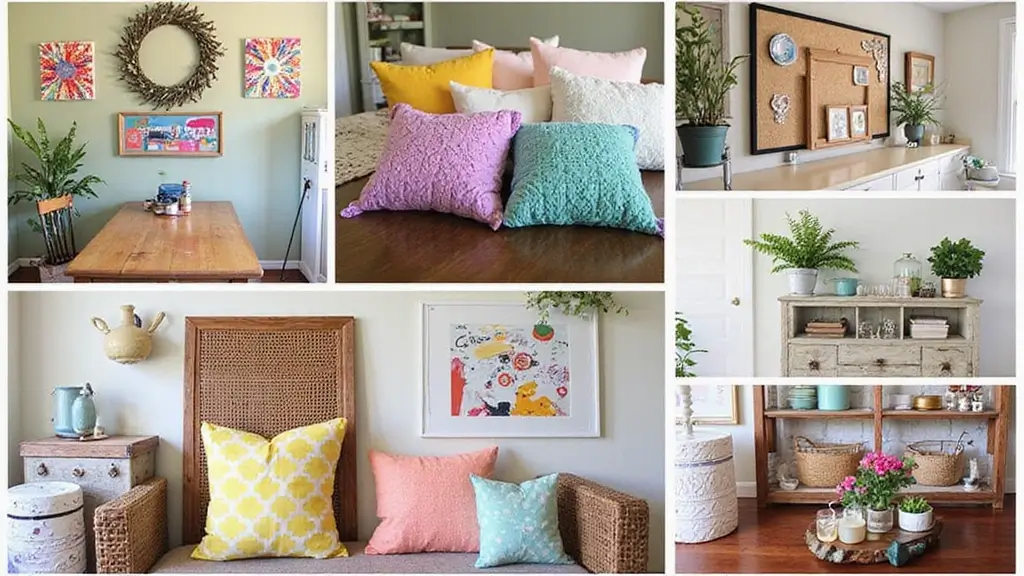
Are you tired of staring at the same old blank walls? Do you want to spruce up your space without breaking the bank? If you’re someone who loves home decor but is also on a budget, you’re in for a treat. I created this post just for you, bringing together some of the best DIY decor projects that look like they belong in a high-end magazine.
These projects are not only wallet-friendly but also fun to make. You don’t need to be a crafting expert to pull them off. Whether you’re looking to refresh your living room or create a cozy nook in your bedroom, these ideas are perfect for anyone wanting to add a personal touch to their space.
In this blog post, you’ll discover 15 ingenious DIY decor projects that can transform your home. Each project is designed to be stylish and approachable, so you won’t feel overwhelmed. From wall art to clever storage solutions, these projects will help you create a home that feels inviting and uniquely yours.
So grab your supplies, roll up your sleeves, and let’s dive into some creative decor that will impress your guests and make your space feel like a million bucks—without the hefty price tag.
1. Rustic Wooden Pallet Art
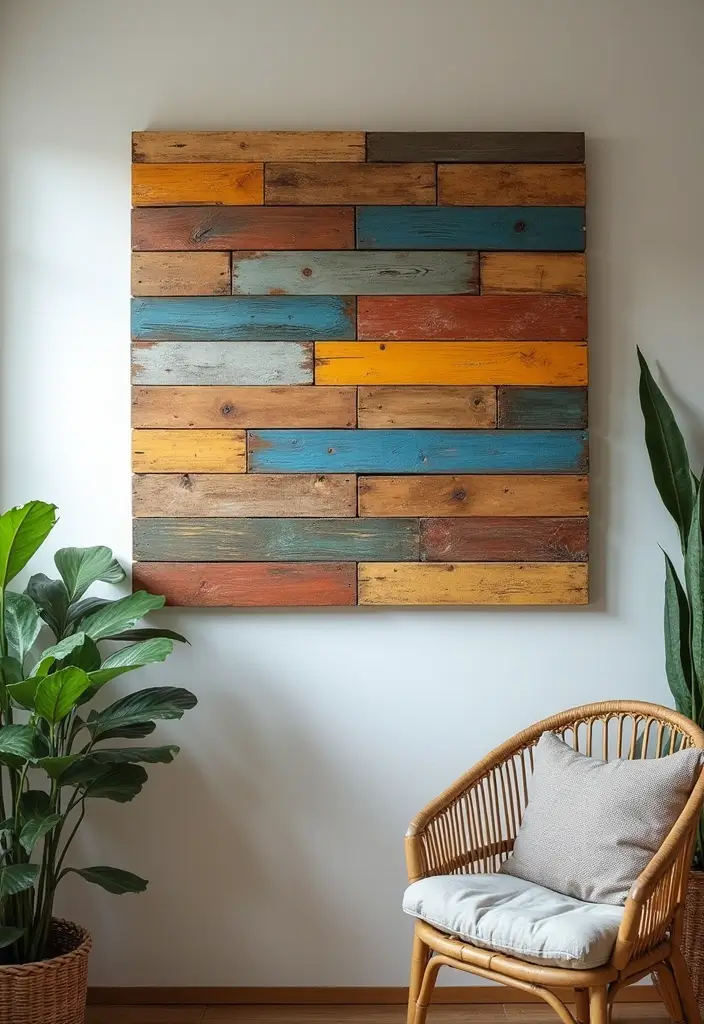
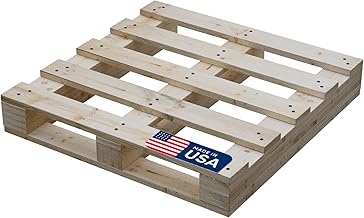
Wooden pallets are a fantastic way to add character to your home without spending a fortune. These sturdy pieces of wood can be transformed into beautiful wall art that tells your story. Picture a rustic pallet, lightly sanded for smoothness, painted in a deep mahogany or distressed white. You might even stencil a meaningful quote on it. Hang this art above your couch or in your entryway to create a warm, welcoming atmosphere. Pinterest users rave about these creative projects, making them a trendy choice for any home.
To get started, look for free or low-cost pallets from local businesses or online marketplaces. Use leftover paint and stains to cut costs even more. You can personalize your pallet art by mixing different sizes and colors to create a dynamic look. Adding hooks at the bottom can turn it into a functional piece for hanging keys or small plants. This project not only makes your space feel inviting but also showcases your unique style.
• Choose a pallet that suits your style, from rustic to modern.
• Use leftover paints for a budget-friendly approach.
• Add hooks for functionality, like hanging plants or keys.
• Mix sizes and colors for a more eye-catching display.
This easy DIY project is perfect for anyone wanting to express their personality through decor while keeping costs low. You’ll create a stunning focal point that’s sure to impress your guests!
Rustic Wooden Pallet Art
Editor’s Choice
Treaton, Heavy-Duty 2-Way Entry Wooden Pallet – 38x36x5”, Industrial-Gra…

ABEIER Washable Finger Paint for Toddlers, Safe Non-Toxic, 12 Vibrant Co…

Wall Hooks for Hanging Towel/Coat – 22LB Screw in Metal Hanger Wall Moun…
2. Elegant Mason Jar Centerpieces
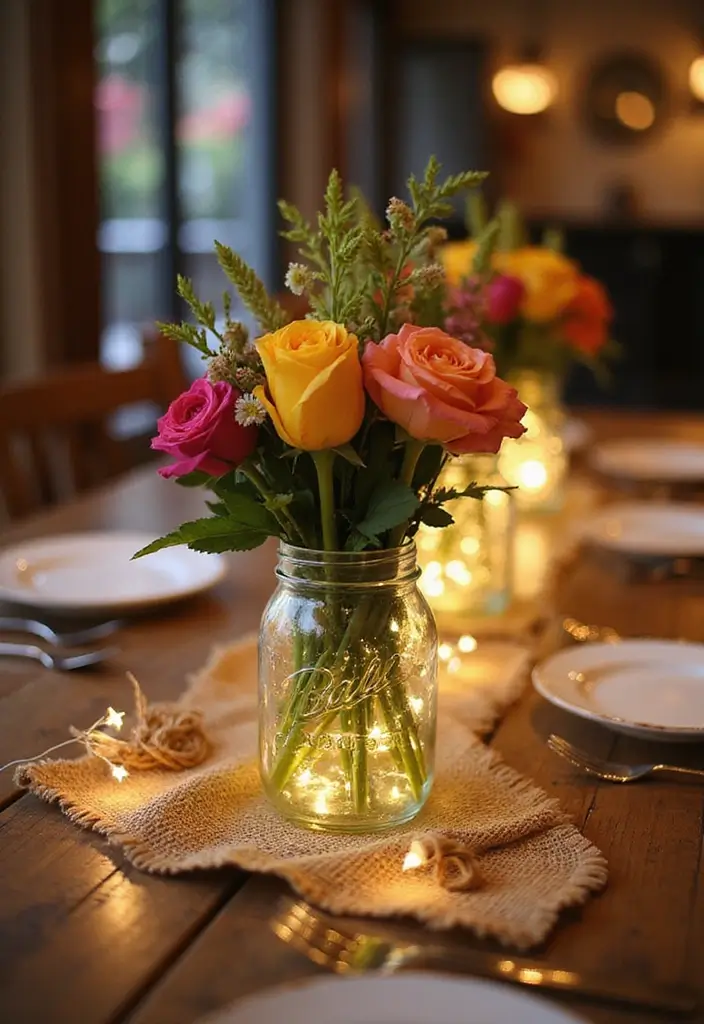
Create stunning centerpieces with elegant mason jars. These versatile jars can hold fresh flowers, twinkling fairy lights, or even seasonal decorations. For a stylish twist, you can wrap the jars in twine or burlap. A metallic paint on the lids can add a sophisticated touch. These centerpieces fit perfectly on your dining table for any occasion, from casual brunches to formal dinners.
To bring your vision to life, start by selecting a color palette that matches your event theme. You might paint some jars in soft pastels for a spring gathering or choose deep jewel tones for a fall feast. Mixing jar sizes creates visual interest on the table. You can also fill the bottom with pebbles or sand to add texture and stability. Best of all, this project is budget-friendly and can be completed in a weekend, making it a delightful way to enhance your home.
• Choose a color scheme that matches your theme.
• Mix sizes for added visual appeal.
• Add pebbles or sand for texture and stability.
• Use seasonal elements for a fresh look.
With these tips, your mason jar centerpieces will not only impress your guests but also bring warmth and charm to your space. Enjoy the process of creating something beautiful that reflects your style!
Elegant Mason Jar Centerpieces
Editor’s Choice

Mason Jars Canning Jars, 24 Pack Jelly Jars With Regular Lids, Ideal for…

ZEAYEA 16 Rolls Colored Jute Twine, 1312 Feet 16 Colors Jute String, 2mm…

Rust-Oleum 334058 Painter’s Touch 2X Ultra Cover Spray Paint, 11 oz, Met…
3. Chic Fabric Wall Hangings
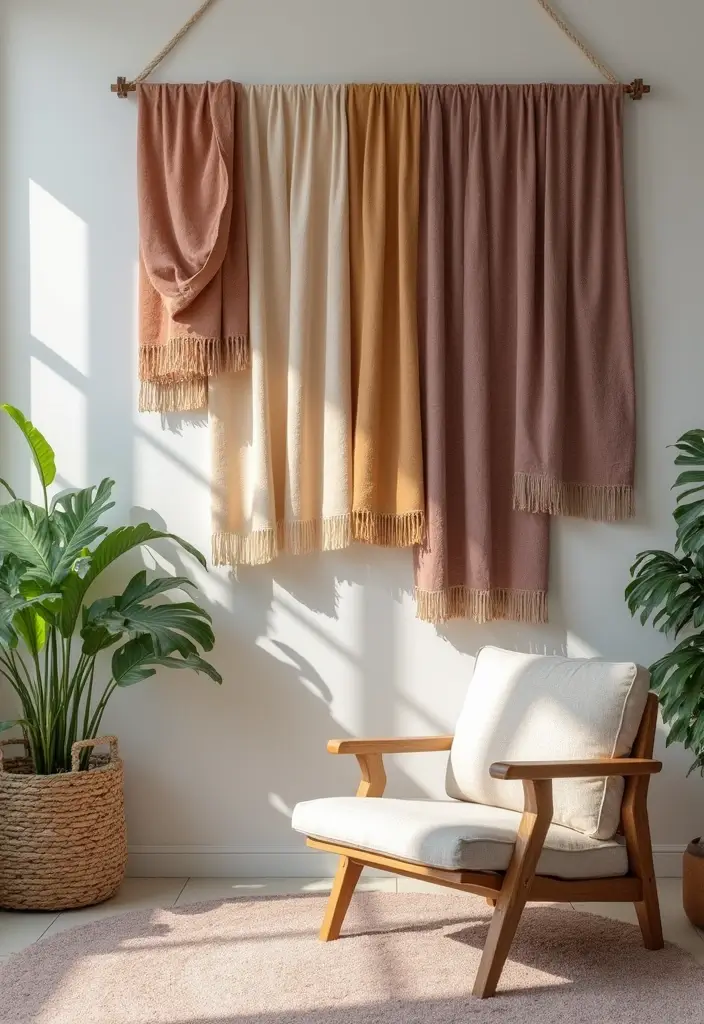
Transform your walls with chic fabric wall hangings that add a stylish touch to any room. Imagine soft, flowing fabrics draping down, making your space feel cozy and inviting. You can use leftover fabric scraps or even repurpose old curtains for this project. Choose colors and patterns that reflect your personality, whether it’s bold prints for a boho vibe or subtle hues for a modern aesthetic. Pinterest is full of inspiring ideas that show how fabric art can elevate your decor.
To create your own masterpiece, start by cutting fabric to your desired length and attaching it to a wooden dowel. This simple technique is easy and budget-friendly. You can layer different fabrics for added depth and interest, making your wall hanging truly unique. Don’t hesitate to add some beads or tassels at the bottom for that trendy finish. This DIY decor project not only saves you money but also lets your personal style shine through, creating a warm and welcoming atmosphere.
Use a wooden dowel for a sleek support.
Choose fabrics with different textures for a layered look.
Add decorative beads or tassels to enhance visual appeal.
Hang your creation in a well-lit area to showcase its beauty.
These fabric wall hangings are perfect for anyone looking to personalize their space without spending a fortune. Embrace your creativity and let your walls tell your story!
Chic Fabric Wall Hangings
Editor’s Choice

HOPELF 25PCS Wooden Dowel Rods – 1/4 x 12 Inch Bamboo Sticks – for Craft…

60 Pcs 4″ x 4″(10cm x 10cm) Assorted Craft Fabric Bundle Squares Patchwo…

Meplait 39in Wood Bead Garland Farmhouse with Tassels,Versatile Prayer B…
4. Vintage Ladder Book Display
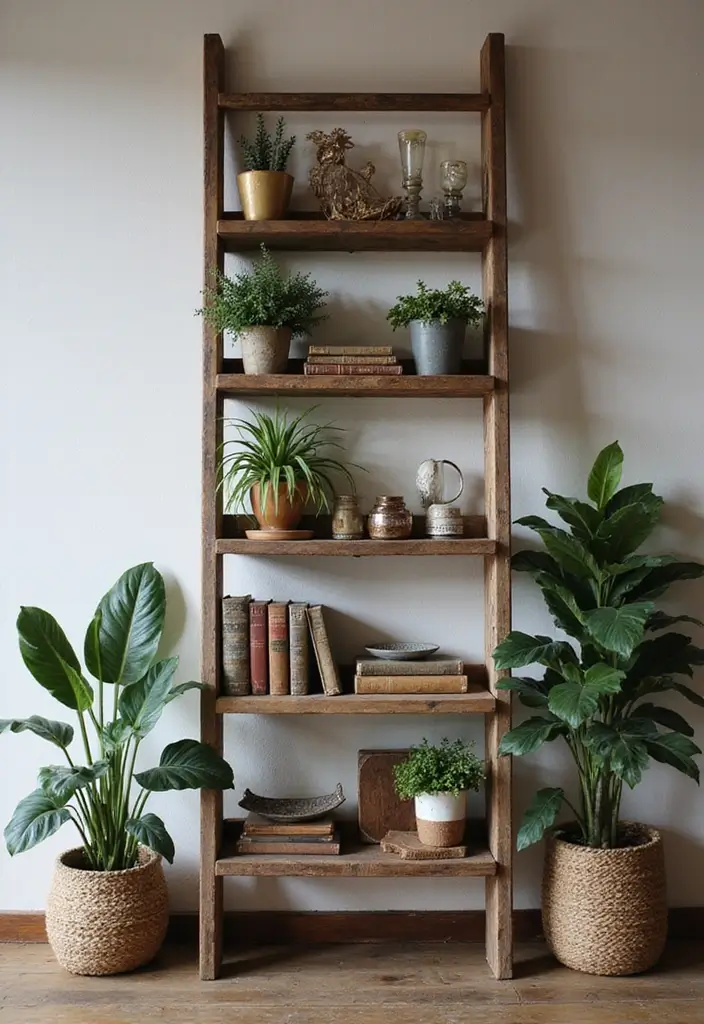
Transform your space with a vintage ladder book display that adds charm and character to any room. This clever idea not only showcases your favorite books but also doubles as a stylish decor piece. Picture an old wooden ladder, gently cleaned and leaning against a wall, serving as a unique canvas for your creativity. Try painting it in a soft pastel or a bold color to match your decor. Pinterest is buzzing with this trend, where rustic meets chic, and you can be part of it!
Getting started is easy and budget-friendly. You can often find old ladders at thrift stores or garage sales for a steal. Once you’ve got your ladder, think about how you want to display your items. Use the rungs to hold books, potted plants, or even decorative baskets. Just make sure the ladder is stable before you add heavier items. This project is perfect for creating a cozy reading nook or a stylish corner in your living room, making it feel inviting and personal.
Here are some tips to make your vintage ladder shine:
– Paint it in a color that complements your home’s palette.
– Use baskets on the rungs for smaller items like magazines or plants.
– Place it in a well-lit area to highlight your display.
– Mix books with decorative items for a curated look.
This simple DIY project will impress your friends and have them thinking you’ve got a designer touch!
DIY decor projects prove that charm can come from a simple ladder. Lean a vintage ladder, showcase your books, and watch your space feel instantly chic. Totally doable on a shoestring budget.
Vintage Ladder Book Display
Editor’s Choice

FolkArt Home Décor Chalk Finish Acrylic Paint, 8oz, 8 ounce, Milk Jug

OIAHOMY 4 Pack Storage Baskets for Organizing, Small Bins for Shelves, C…
5. Upcycled Bottle Vases
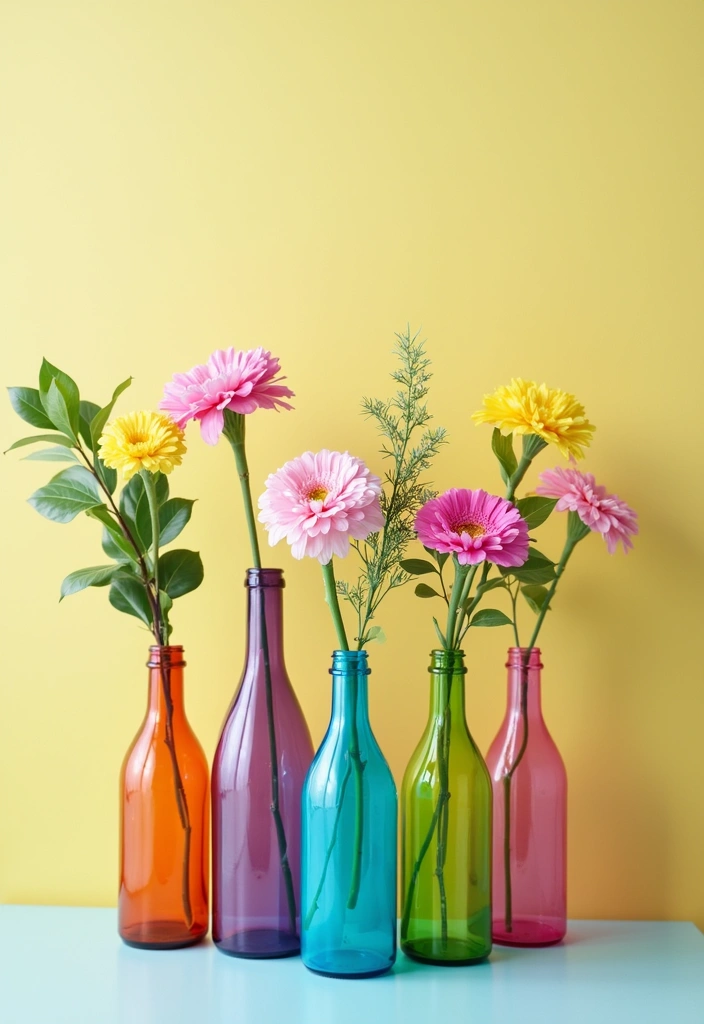
Breathe new life into your home with upcycled bottle vases! Instead of tossing those empty glass bottles, transform them into eye-catching decor that adds character to your space. A quick wash and some paint can turn a simple bottle into a beautiful vase. Choose vibrant colors or soft pastels to match your style. Use a sponge to create a textured effect, or go for a glossy finish for a modern touch. These vases, especially when filled with fresh flowers or lush greenery, can brighten up any room, making it feel inviting.
Getting started is easy and budget-friendly. Look for bottles of different shapes and sizes to create an interesting display. You can pick up bottles from your pantry, or even visit thrift stores to find unique pieces. Don’t be afraid to play with embellishments! Adding twine, lace, or ribbon can give your vases a charming vintage feel. This DIY project not only helps you save money, but it also allows you to express your style, making your home feel warm and personalized.
• Use bottles of various shapes for visual interest.
• Choose colors that complement your decor.
• Add twine or lace for a rustic touch.
• Fill with single stems for a minimalist look.
With a little creativity, upcycled bottle vases can become a standout feature in your home, making it feel truly unique. Enjoy the process of creating something beautiful while being kind to your wallet!
Upcycled Bottle Vases
Editor’s Choice

Acrylic Paint Set, 24 Colors (2 oz/Bottle) with 12 Art Brushes, Art Supp…
ZEAYEA 16 Rolls Colored Jute Twine, 1312 Feet 16 Colors Jute String, 2mm…

Glass Bottle Cutter, Upgraded Bottle Cutting Tool Kit, DIY Machine for C…
6. DIY Terrariums
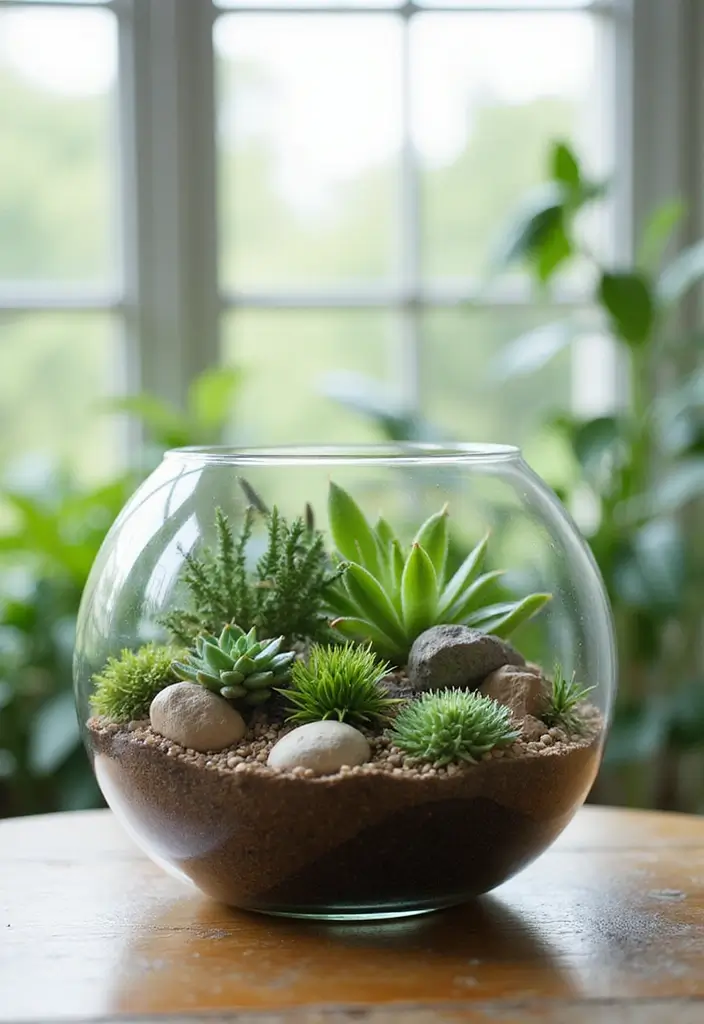
Create your own little oasis with a DIY terrarium! These miniature gardens bring a slice of nature into your home. All you need is a clear glass container, potting soil, and a few small plants. Start by layering rocks at the bottom for drainage, then add soil and arrange your plants. You can even sprinkle in decorative stones or tiny figures to personalize your creation. Pinterest is buzzing with these charming displays, which can brighten up any space—from your desk to your dining table.
To get started, choose low-maintenance plants like succulents or air plants. These beauties thrive with minimal care, making them perfect for beginners. You can also experiment with different containers, such as fish bowls or mason jars, to create unique looks. Place your terrarium in a spot with indirect sunlight to help your plants flourish. This project is not only budget-friendly but also a delightful activity for the whole family, resulting in a stunning piece that adds warmth to your home.
• Choose easy-care plants like succulents or air plants for success.
• Pick various containers like jars or fish bowls for creativity.
• Add decorative stones or figures for a personal touch.
• Place in indirect sunlight for optimal growth.
Turn any corner into a tiny green retreat with DIY decor projects like terrariums. Start with a clear glass container, layer rocks and soil, then tuck in small plants and decorative touches. Your desk or dining table will feel refreshed—and totally inspired!
DIY Terrariums
Editor’s Choice

Altman Plants, Live Succulent Plants (20 Pack) Assorted Potted Succulent…

WGVI Clear Slant Cut Bowl Glass Vase, Glass Terrarium, Candy Dish, Glass…

2LB Succulent and Cactus Gravel Pebbles, 1/5 Inch Natural Decorative Pol…
7. Cozy Pillow Covers
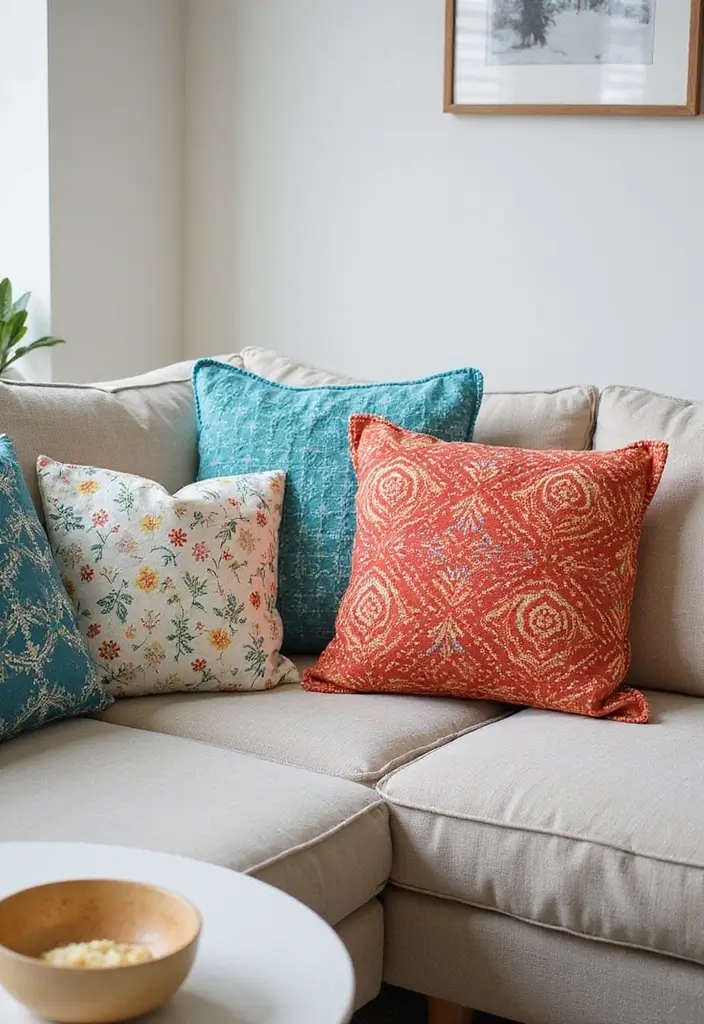
Revamp your living room with cozy DIY pillow covers that add warmth and style. Imagine soft textures and inviting colors that make your space feel like home. You can use fabric scraps, old clothes, or even those throw blankets that have been tucked away. This is your chance to get creative! Whether you choose bold patterns or calming solid colors, your pillows can reflect your personal style. Trends on platforms like Pinterest show that mixing different fabrics can create a bohemian vibe that’s truly unique.
Ready to dive in? Start by gathering materials you already have. This project is budget-friendly and perfect for beginners. If you have basic sewing skills, grab a needle and thread. If not, fabric glue works wonders too! Consider adding zippers or buttons to give your covers a polished look. Using removable pillow inserts also allows you to switch out covers easily, keeping your decor fresh. With just a bit of effort, you’ll create beautiful accents that make your living area feel cozy and inviting.
• Use fabric scraps or old clothes for budget-friendly covers
• Mix patterns and colors for a boho look
• Add zippers or buttons for a polished finish
• Choose removable inserts for easy style changes
This simple project can transform your living space into a chic retreat. You’ll enjoy the satisfaction of making something with your own hands while adding a personal touch that feels just right.
Cozy Pillow Covers
Editor’s Choice

Utopia Bedding Throw Pillows (Set of 4, White), 18 x 18 Inches Pillows f…

Fabric Glue Permanent, 60 ML Washable Clear Clothing Glue, Super Fabric …

Coquimbo Sewing Kit Christmas Stocking Stuffers White Elephant Gifts for…
You might also like
8. Stylish Wall Mirrors
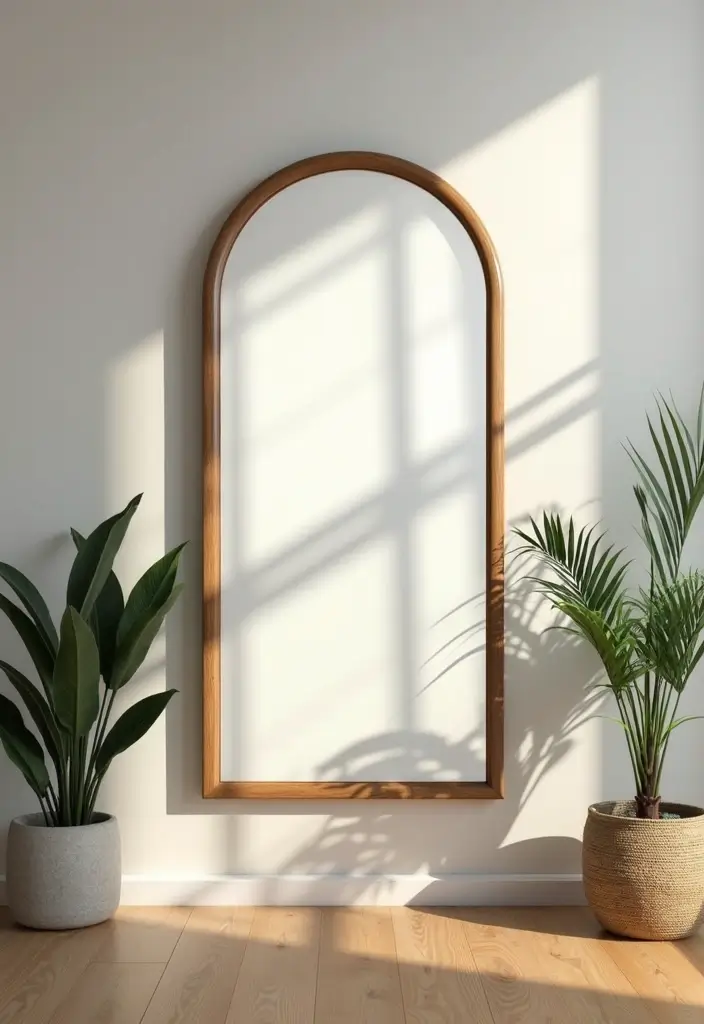
Mirrors can completely transform a space. They reflect light, making rooms feel brighter and bigger. Instead of splurging on pricey options, why not make one yourself? Start with a simple, affordable mirror from a craft store. Then, frame it with wood, rope, or even colorful fabric for a trendy touch. Choose colors and materials that fit your style. Pinterest showcases plenty of ideas, like using reclaimed wood for a rustic vibe or vibrant rope for a beachy feel.
To create your stylish wall mirror, gather your materials and get creative. Look for mirrors in unique shapes, like round or geometric styles, to add visual interest. You can also personalize your frame with paint or stains that match your décor. If you want to go a step further, consider adding decorative elements like shells or stones around the edge for a boho look. Hanging several mirrors together can give an eclectic, gallery-style effect, perfect for a living room or hallway.
• Choose mirrors in unique shapes for added flair.
• Add decorative elements like shells or stones for a personal touch.
• Frame with wood or rope to match your existing decor.
• Group mirrors together for an eclectic gallery look.
This project is quick and budget-friendly. You can easily finish it in an afternoon. Plus, you’ll have a stylish piece that elevates your space without breaking the bank. Enjoy the sense of accomplishment as you admire your handmade creation!
Stylish Wall Mirrors
Editor’s Choice

Sweetcrispy 20in Round Bathroom Mirrors for Wall, Bathroom Mirrors for O…

12 Pack Wooden Picture Frames for Crafts, DIY Wood Picture Painting Fram…

River Rocks, Decorative Ornamental Pebbles,Garden Landscaping Stones,Gra…
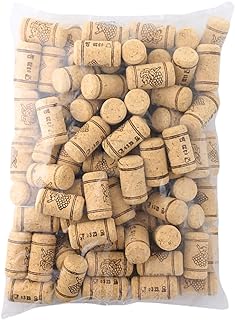
9. Creative Corkboards
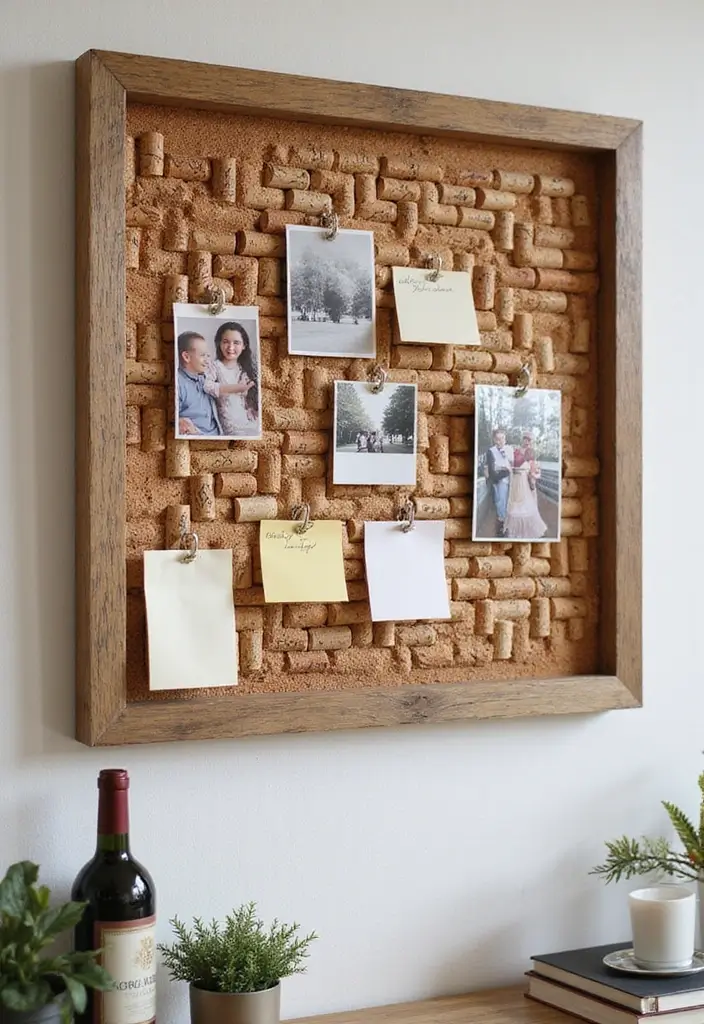
Create stunning and functional corkboards using wine corks for a stylish addition to your home decor. These boards not only serve as a practical place for reminders but also bring personality to your walls. Picture a board painted in a soft pastel shade, dotted with natural corks, arranged in a fun pattern. This trend is popular on Pinterest, where users showcase their unique designs, making them perfect conversation starters during gatherings.
To get started, gather corks from your favorite wines. You can find an inexpensive board at a craft store or even use an old frame. Paint or stain the board to match your room’s theme. Arrange your corks in various sizes and colors for a visually appealing effect. This DIY project is budget-friendly and allows you to express your creativity, making your space feel inviting and personal.
• Gather corks from wine bottles to recycle and create art.
• Paint the board to match your decor for a cohesive look.
• Use various cork sizes for an eye-catching design.
• Frame the corkboard for a polished finish that enhances style.
With these simple steps, you can craft a corkboard that not only serves a purpose but also adds charm to your home. It’s a delightful way to display memories, notes, and more while showing off your creative flair. Enjoy the process and watch your space transform!
Creative Corkboards
Editor’s Choice
FastRack Bag of 100, #8 Straight Wine Corks for Wine Bottles | 1.73″ x 0…

U Brands Cork Bulletin Board, 18″ x 24″ Inches, Light Birch Wood Frame (…
Acrylic Paint Set, 24 Colors (2 oz/Bottle) with 12 Art Brushes, Art Supp…
10. Painted Terra Cotta Pots
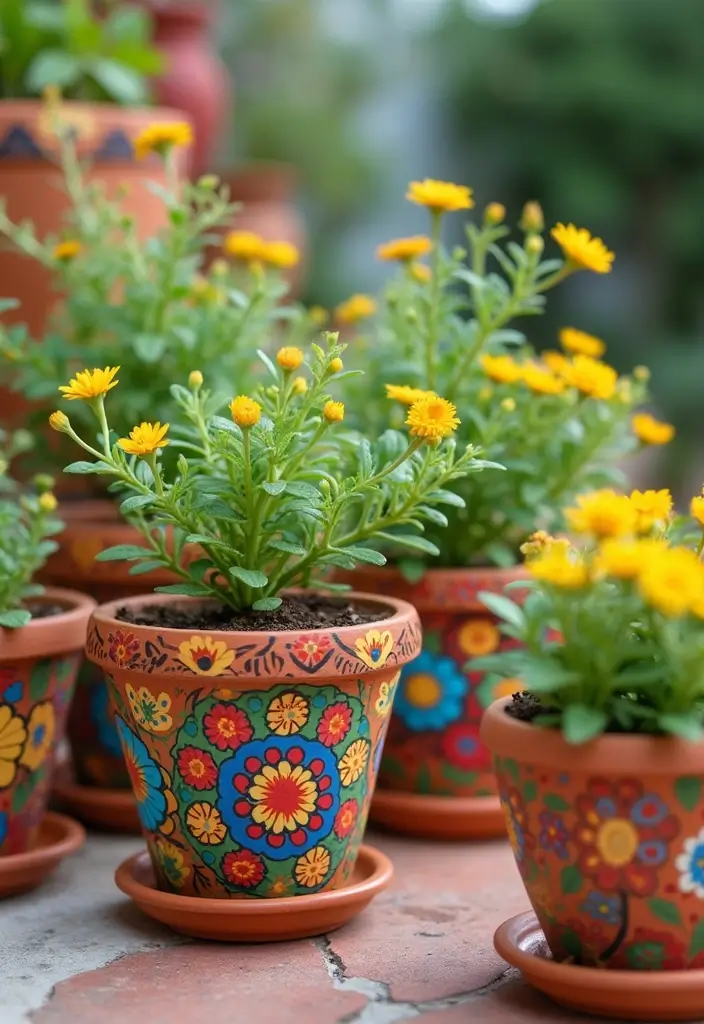
Add some flair to your indoor garden with painted terra cotta pots! These pots can be a canvas for your creativity. Pick up some simple terra cotta pots from a local garden center. Then grab some acrylic paint and let your imagination run wild. You can go for a sophisticated white look or choose bold colors and fun patterns that reflect your personality. Pinterest users are loving this trend, and it’s a fantastic way to brighten up any room.
To make your painted pots really pop, here are some easy tips. First, use painter’s tape to create sharp lines and geometric designs. If you want to add more detail, try using stencils for intricate looks. After you’re done painting, remember to seal your pots with a clear coat. This step makes your artwork durable and keeps it looking fresh. Not only are these pots budget-friendly, but they also allow you to express your style. You’ll find that these cheerful pots create a warm and inviting atmosphere, making your space feel like home.
• Use painter’s tape for clean design lines.
• Choose stencils for intricate patterns.
• Seal with a clear coat for lasting durability.
• Pick bold colors to brighten any room.
Get started today and watch how these painted pots can transform your living space into a stylish retreat!
Did you know that DIY decor projects with painted terra cotta pots can refresh a room in under 60 minutes? A splash of white or bold patterns instantly brightens spaces and costs less than store-bought accents—perfect for a stylish, budget-friendly home.
Painted Terra Cotta Pots
Editor’s Choice
Acrylic Paint Set, 24 Colors (2 oz/Bottle) with 12 Art Brushes, Art Supp…

4 Rolls Premium Painters Tape, Blue Tape, Masking Tape, Paint Tape for M…

YEAJON 2 Inch Letter Stencils Symbol Numbers Craft Stencils, 42 Pcs Reus…
11. DIY Picture Frames
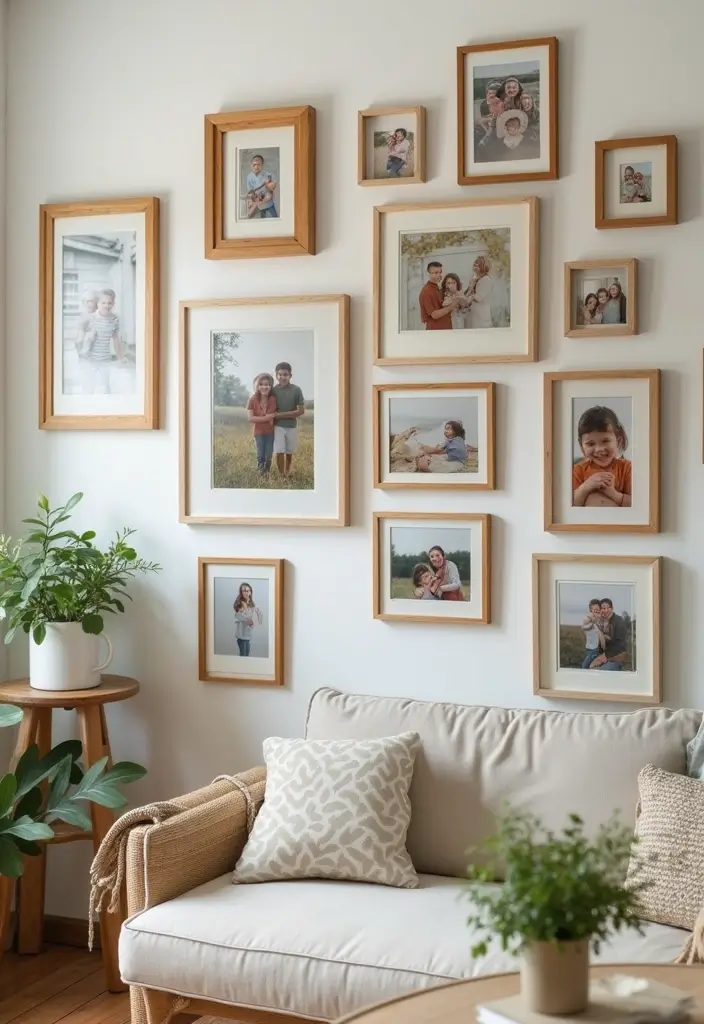
Creating your own picture frames can add a personal touch to your favorite photos. You can use materials like wood, cardboard, or even repurpose old frames. Imagine painting them in bold colors or wrapping them in pretty fabric. For a vintage vibe, consider gluing on old jewelry pieces. These unique frames not only display your cherished moments but also elevate your home decor, making it feel warm and inviting.
To kickstart your DIY frame project, gather your supplies. Thrift stores are a goldmine for inexpensive frames and materials. You can mix and match styles for a gallery wall that showcases your personality. Pinterest is filled with inspiration for creating a stunning display that feels curated. Plus, making frames in bulk is a thoughtful gift idea for friends and family—perfect for birthdays or holidays!
Here are some tips to get you started:
• Use different materials for a layered look.
• Choose colors that complement your home decor.
• Pick a theme for your gallery wall for a cohesive feel.
• Add embellishments like ribbons or beads for extra flair.
With just a few materials and your creativity, you can turn ordinary frames into extraordinary pieces that reflect your style. Enjoy the process and let your imagination shine!
DIY Picture Frames
Editor’s Choice
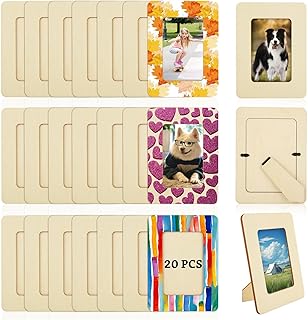
20 PCS Wooden Picture Frames for Craft Unfinished Wood Photo Frames with…
Chenkou Craft Random 100g/lot (Around 400pcs) 4-20mm Half Round Imitatio…
Acrylic Paint Set, 24 Colors (2 oz/Bottle) with 12 Art Brushes, Art Supp…
12. Colorful Wooden Blocks

Bring a splash of color into your home with colorful wooden blocks! This fun DIY project transforms old wood into vibrant decor pieces that can also double as toys. Picture bright reds, sunny yellows, and playful patterns adorning your shelves. You can stack these joyful blocks in various shapes, creating an eye-catching display. Pinterest users adore this trend, showcasing how these blocks can brighten up children’s rooms or any lively space.
To get started, gather some scrap wood and sand it down until smooth. Then, choose non-toxic paint in bold colors or whimsical designs. This budget-friendly project not only saves money but also fits perfectly into modern design principles like minimalism and playfulness. Plus, you can easily personalize your blocks by painting letters or numbers for a fun educational twist. It’s a delightful way to infuse your home with cheer and creativity!
• Use non-toxic paint to ensure safety for kids
• Choose bright colors for a lively atmosphere
• Arrange in unique formations for added visual interest
• Add letters or numbers for educational fun
With these easy steps, your home will radiate warmth and joy. Enjoy the process of making something unique and watch how it transforms your space!
Colorful Wooden Blocks
Editor’s Choice

Apple Barrel Acrylic Paint in Assorted Colors (8 Ounce), 20403 White
VOLSIVE 7pcs Hand Sanding Block Set, Rectangle Handheld Sanding Pad, Hoo…
13. Whimsical String Art
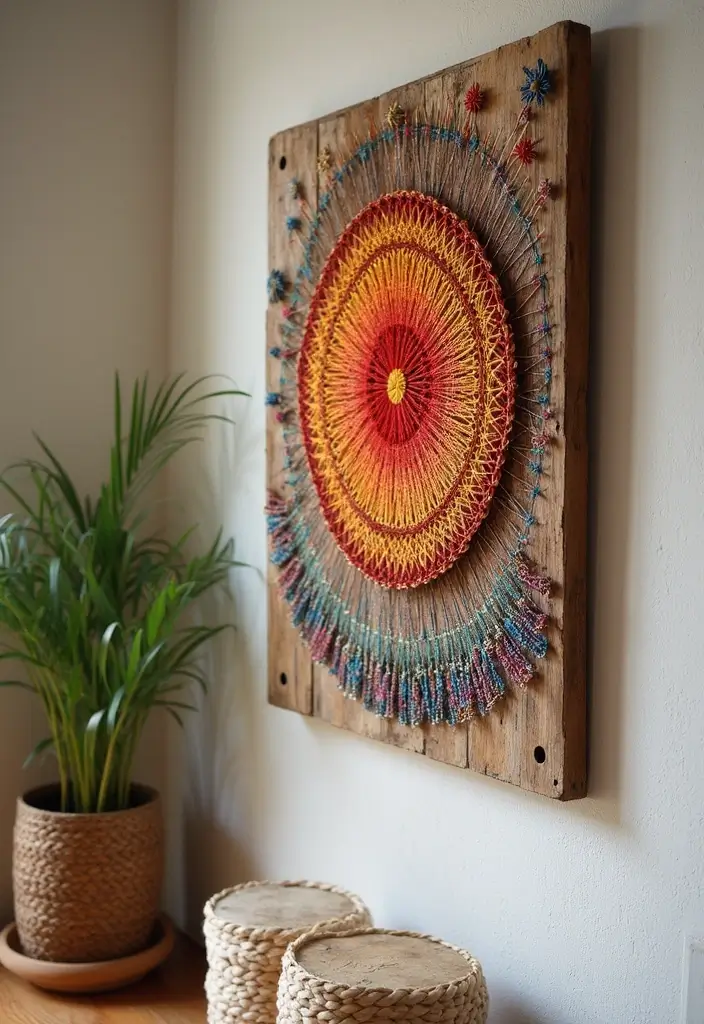
Bring a playful twist to your home decor with whimsical string art. This project is not just fun; it’s a fantastic way to express your creativity on a budget. All you need is a wooden board, some nails, and vibrant string. You can outline a shape, like a star or a heart, and wrap the string around the nails to fill it in. This colorful addition can brighten up any wall and is a great conversation starter, especially if you hang it in a child’s room or a cozy reading nook.
Looking for inspiration? Check out Pinterest for trending designs. You’ll find unique ideas ranging from geometric patterns to inspiring quotes. The best part? You can customize the colors of the string to match your room’s theme or your mood. This simple project can transform a plain wall into a stunning focal point, making your space feel more inviting and personal.
Ready to dive in? Here are some practical tips to get started without breaking the bank:
Use a sturdy wooden board as your base. Thrift stores often have great options.
Choose bright, bold colors for the string to make your art pop.
Pick a simple design to start, like a heart or an arrow, for easy execution.
Add a coat of paint to your board for an extra touch of flair before you begin.
This DIY project not only enhances your decor but also gives you a sense of accomplishment. It’s perfect for rainy days or when you need a creative outlet. So gather your supplies and let your imagination run wild!
Whimsical String Art
Editor’s Choice

Balsa Wood Sheet, 5 Pack Plywood Sheets, Basswood Sheets 12X12X1/16 Inch…

Friendship Bracelet String 50 Skeins Rainbow Color Embroidery Floss Cros…

1200Pcs Small Tiny Nails Carbon Steel Brass Plated for Wooden DIY Micro …
14. Decorative Book Ends
Looking to add a touch of style and organization to your space? Decorative bookends might be the perfect solution! These charming accents not only keep your favorite reads in place but also enhance your decor. Imagine vibrant colors that pop or a sleek concrete finish that adds a modern twist. Pinterest is buzzing with ideas, showcasing everything from minimalist designs to eclectic styles that reflect your unique taste.
Creating your own bookends doesn’t have to break the bank. Gather materials like reclaimed wood, leftover paint, or even old bricks for a rustic vibe. You can even mix and match styles for a personal touch. This DIY project is not just budget-friendly; it helps you express your creativity. Each pair of bookends you make will add character to your shelves and make your space feel more inviting.
• Choose materials like wood or concrete for durability.
• Paint them to match your room’s color scheme.
• Customize height based on your book sizes for functionality.
• Decorate with fabric or wallpaper for a personal flair.
With a little effort, you can turn simple materials into stunning pieces that elevate your home’s style. Enjoy the process of crafting and watch your shelves come to life!
Decorative Book Ends
Editor’s Choice

MaxGear Book Ends Tree Design Modern Bookends for Shelves, Non-Skid Book…

Dan&Darci Arts and Crafts Vault – Craft Supplies Kit in a Box for Kids A…
Acrylic Paint Set, 24 Colors (2 oz/Bottle) with 12 Art Brushes, Art Supp…
15. Unique Candle Holders
Create stunning candle holders that add a touch of magic to your home! You can turn everyday items into eye-catching decor with just a bit of creativity. Think about using simple materials like tin cans or glass jars. Want something fresh? Try hollowing out an orange or pineapple. These unique holders can be painted or decorated to reflect your personal style, making every space feel special. As seen in popular DIY blogs, these projects can instantly brighten up any room.
Start this fun project by gathering materials you already have at home. Look through your recycling bin or pantry. This keeps costs down and sparks creativity. Mix and match holders of different shapes and sizes to create a playful centerpiece. This eclectic look is perfect for dining tables or cozy corners, instantly making your home feel warm and inviting.
• Use tin cans or jars for a rustic look
• Choose fruits like oranges for a fresh twist
• Paint or decorate to match your decor style
• Mix holder shapes for a fun centerpiece
With these tips, you can craft beautiful candle holders that won’t break the bank. So gather your supplies, get creative, and enjoy the cozy glow they bring to your space!
Unique Candle Holders
Editor’s Choice
Acrylic Paint Set, 24 Colors (2 oz/Bottle) with 12 Art Brushes, Art Supp…

Anchor Hocking Heritage Hill 1 Gallon Glass Jar with Lid, Set of 2
Conclusion

With these 15 ingenious DIY decor projects, your home can reflect your personal style without costing a fortune. Each project is not only doable on a budget but also fun and fulfilling. Whether you tackle one or all, you’ll find joy in making your space uniquely yours. Let your creativity soar and enjoy the journey of crafting!
Note: We aim to provide accurate product links, but some may occasionally expire or become unavailable. If this happens, please search directly on Amazon for the product or a suitable alternative.
This post contains Amazon affiliate links, meaning I may earn a small commission if you purchase through my links, at no extra cost to you.
Frequently Asked Questions
What Are Some Easy DIY Decor Projects for Beginners?
If you’re just starting out with DIY decor projects, you’ll be happy to know there are plenty of easy crafts to try! Consider simple projects like creating your own decorative pillows, repurposing glass jars into stylish vases, or painting wooden crates for storage. These projects not only add a personal touch to your home but also boost your interior styling skills without breaking the bank!
How Can I Decorate My Home on a Budget?
Decorating your home on a budget is absolutely possible! Look for budget decor options like thrift store finds or upcycled materials. You can also try DIY projects that transform everyday items into beautiful decor. For instance, fresh paint or new hardware can breathe new life into old furniture. Remember, creativity is key, and even small changes can make a big impact!
What Are Some Weekend DIY Decor Projects I Can Try?
Looking to spruce up your space over the weekend? There are many fun weekend projects you can tackle! How about making a gallery wall with framed photos or creating your own wall art? Another great idea is to design a custom shelf using reclaimed wood. These projects are not only enjoyable but also provide a satisfying sense of accomplishment once completed!
Can I Use Recycled Materials for DIY Decor Projects?
Absolutely! Using recycled materials is a fantastic way to create unique and eco-friendly DIY decor projects. Think outside the box: cardboard boxes can become stylish storage solutions, and old fabrics can be reimagined into beautiful wall hangings or cushions. Not only does this approach save you money, but it also gives your decor a distinctive character that reflects your personal style!
What Are Some Quick DIY Decor Ideas That Look Professional?
If you’re short on time but want your home to look professionally styled, there are several home decor ideas to consider! Try adding fresh greenery for a pop of color, or use decorative trays to organize and elevate everyday items. Another quick fix is to swap out existing hardware or light fixtures for something more modern. These small changes can significantly enhance your space without requiring a lot of effort!
Related Topics
DIY decor projects
budget decor
weekend crafts
easy home styling
interior design
creative upcycling
beginner friendly
affordable elegance
home improvement
stylish DIY
modern decor
seasonal projects