Are you looking around your home and feeling like it needs a little boost? Maybe the walls are looking a bit dull, or your living space just feels a bit uninspired. You’re not alone! Many of us crave a fresh look but think home decor can be complicated or too expensive. That’s why I created this post. I believe that transforming your space can be both fun and simple, even if you’re not a pro at crafting.
This post is perfect for anyone who loves a good DIY project. Whether you’re a seasoned crafter or someone who just wants to make your living space feel more like you, these projects are designed to be approachable and enjoyable. You don’t need fancy tools or expensive materials—just a little creativity and a bit of time. Plus, some of them are even kid-friendly! Imagine creating something beautiful together with your little ones.
You’ll discover 25 easy DIY home decor projects that will inspire you to roll up your sleeves and get started. Each project is designed to be straightforward and rewarding, so you can enjoy the process and see quick results. From wall art to personalized accents, these ideas will help you add your unique touch to your home.
So grab your craft supplies and get ready to transform your space! With these fun and simple projects, you’ll not only breathe new life into your home but also create lasting memories along the way. Let’s dive in and get started!
1. Upcycled Mason Jar Vases
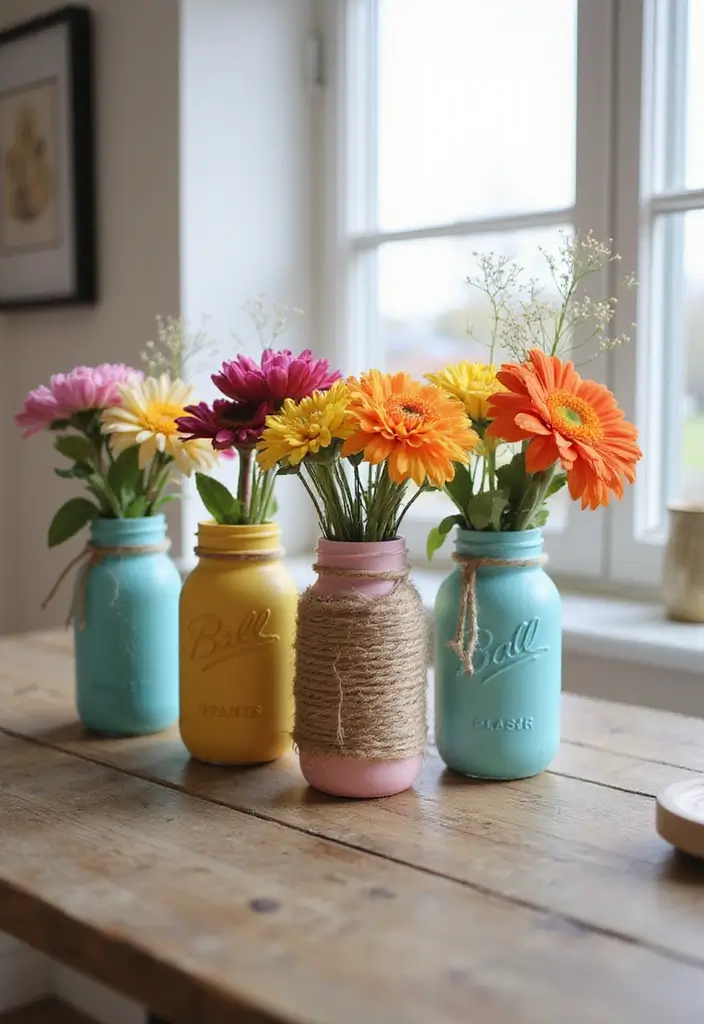
Turn your plain mason jars into eye-catching vases that can brighten any room. This project is simple and fun, perfect for all ages. Here’s how to get started.
First, gather your materials: mason jars, some paint, and any decorative items you love, like twine or stickers. Before you begin, make sure to clean the jars and peel off any labels.
Next, let your creativity shine. You can paint the jars in vibrant colors to match your decor. If you prefer a rustic look, try wrapping the jars in twine or burlap. Want to add a personal touch? Use stencils or stickers to create unique designs.
Using different jar sizes can make your arrangement more visually appealing. Place them on a windowsill or a coffee table for a splash of color.
Don’t hesitate to experiment with textures, like lace or fabric, for added charm. These vases aren’t just for flowers; they can also serve as candle holders. Imagine the soft, warm glow they’ll cast in the evening light.
This project is not only a great way to upcycle but also a fun activity for you and your kids. Enjoy the process and watch your space come alive with your new creations!
Upcycled Mason Jar Vases
Editor’s Choice
![Wide Mouth Mason Jars 16 oz with Lids [6 Pack], Canning Jars with Metal ...](https://m.media-amazon.com/images/I/815tipUxlyL._AC_UL320_.jpg)
Wide Mouth Mason Jars 16 oz with Lids [6 Pack], Canning Jars with Metal …

Acrylic Paint Set, 24 Colors (2 oz/Bottle) with 12 Art Brushes, Art Supp…

Quotidian Brown Natural 3 ply Jute Jute Twine Rolls 1/12″ (0.2cm) 1000 F…
2. Personalized Family Photo Wall
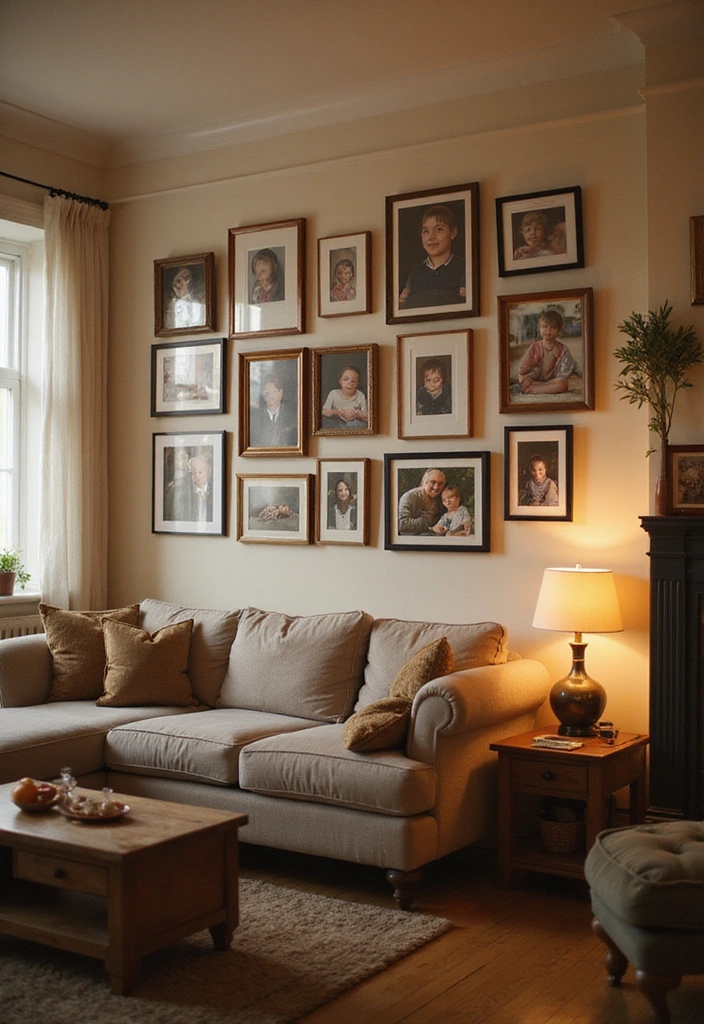
Bring your family memories to life with a Personalized Family Photo Wall! This fun project will not only decorate your space but also create a warm, inviting atmosphere.
Start by choosing a blank wall in your home. This will be your canvas. Gather your favorite family photos. Mix and match different frame sizes for a lively feel, or stick with similar frames for a polished look. You can even paint or decorate the frames to add a personal touch.
Before you start hanging, lay the frames on the floor. This helps you visualize how they will look on the wall. Don’t forget to include your kids’ drawings or special mementos. These personal touches make the wall even more meaningful.
When it’s time to hang the frames, use a level to ensure they’re straight. This simple tool makes a big difference! If you want flexibility, consider using command strips. They allow for easy removal and rearrangement without damaging your walls.
Next, take a step back and enjoy your new photo wall. This project isn’t just about decoration. It’s about celebrating your family’s story and creating a space where everyone feels connected. Your family photo wall will be a conversation starter and a source of joy for years to come.
So, what are you waiting for? Gather those photos and make your memories shine!
Personalized Family Photo Wall
Editor’s Choice

LUCKYLIFE Picture Frames Collage Wall Decor 10-Pack, Gallery Wall Frame …

15 lb Large Picture Hanging Strips 14 Pairs (28 Command Strips), Damage-…

Torpedo Level Magnetic, Firecore 9 Inch Shockproof Small Leveler Tool wi…
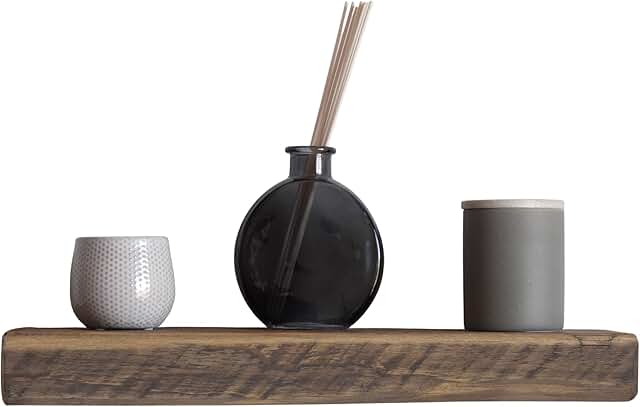
3. DIY Floating Shelves
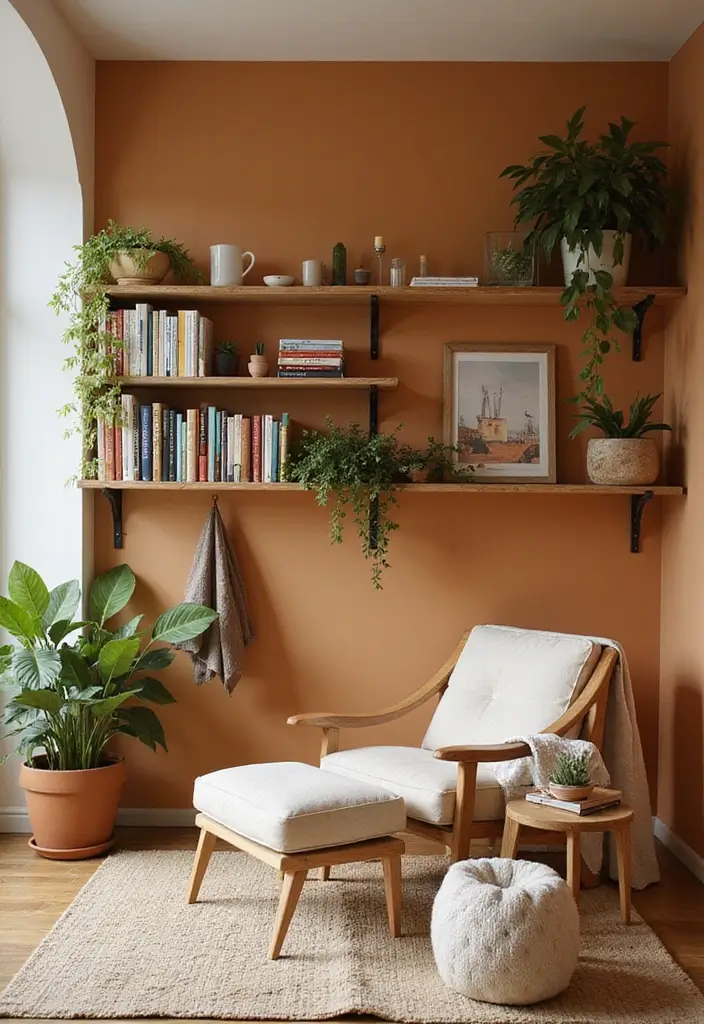
Looking to spruce up your home without breaking the bank? DIY floating shelves are a fantastic way to add charm and storage to any room. They’re not just practical—they can be a stylish focal point too!
Why Floating Shelves?
Floating shelves give you a sleek and modern look. They create the illusion of space, making your room feel larger. You can showcase your favorite books, plants, or family photos. Plus, they’re a great way to organize clutter and keep your home tidy.
Materials You’ll Need
You can choose between reclaimed wood for a rustic feel or fresh boards that you can paint to match your decor. Don’t forget to grab some sturdy brackets to hold your shelves securely.
Installation Steps
1. Mark the Wall: Use a level to mark where you want your shelves.
2. Attach the Brackets: Drill the brackets into your wall at the marked spots. Make sure they’re level!
3. Place the Shelves: Slide the shelves onto the brackets. Ensure everything feels secure.
Styling Tips
Once your shelves are up, you can style them! Arrange your items by color or size for a polished look. Incorporate some greenery—like small potted plants or succulents—to breathe life into the space.
Keep in mind that heavier items, like large books, can weigh down the shelves. Always check that your brackets and shelves can support the weight of what you plan to display.
With a little creativity, your floating shelves can become a stunning feature in your home. Dive in and start transforming your space today!
DIY Floating Shelves
Editor’s Choice
Reclaimed Wood Floating Shelves Real Solid Thick Wood Rustic Shelf Handmade

4-Pack 12 Inch Heavy Duty Shelf Brackets, Large Wall Bracket for Garage …

Der Rose Set of 6 Succulents Plants Artificial in Pots Small Fake Plants…
4. Fabric Wall Art
Is your wall feeling a bit bare? Fabric wall art could be the perfect solution. This DIY project is not only budget-friendly but also highly customizable, letting you express your personal style effortlessly.
Start by gathering some fabric remnants that catch your eye. Think about colors and patterns that complement your existing decor. You can go for a cohesive color palette or mix different prints for a playful vibe. The choice is yours!
Next, stretch the fabric over a canvas frame. To do this, grab a staple gun and secure the fabric tightly to the back of the frame. Make sure to pull it snugly to avoid any wrinkles. This simple technique gives you a clean, finished look that can elevate any room.
Want to refresh your space? The beauty of fabric wall art is that you can easily swap the fabric with the seasons or when your mood changes. Just un-staple the old fabric and replace it with something new!
If you’re feeling creative, try combining smaller fabric pieces into a larger gallery-style arrangement. This approach allows you to showcase your unique style and can be a fun activity to do with your kids. Just remember, the more you play with patterns and colors, the more character your wall will have.
So grab those fabric scraps and get started on your own stunning wall art today! Your walls will thank you.
Fabric Wall Art
Editor’s Choice

Upholstery Staple Gun Heavy Duty, YEAHOME 4-in-1 Stapler Gun with 4000 S…

MCS Canvas Float Frames 16×20 Frame, Walnut Woodgrain for Finished Canva…

60 Pcs 4″ x 4″(10cm x 10cm) Assorted Craft Fabric Bundle Squares Patchwo…
5. Decorative Pillow Covers
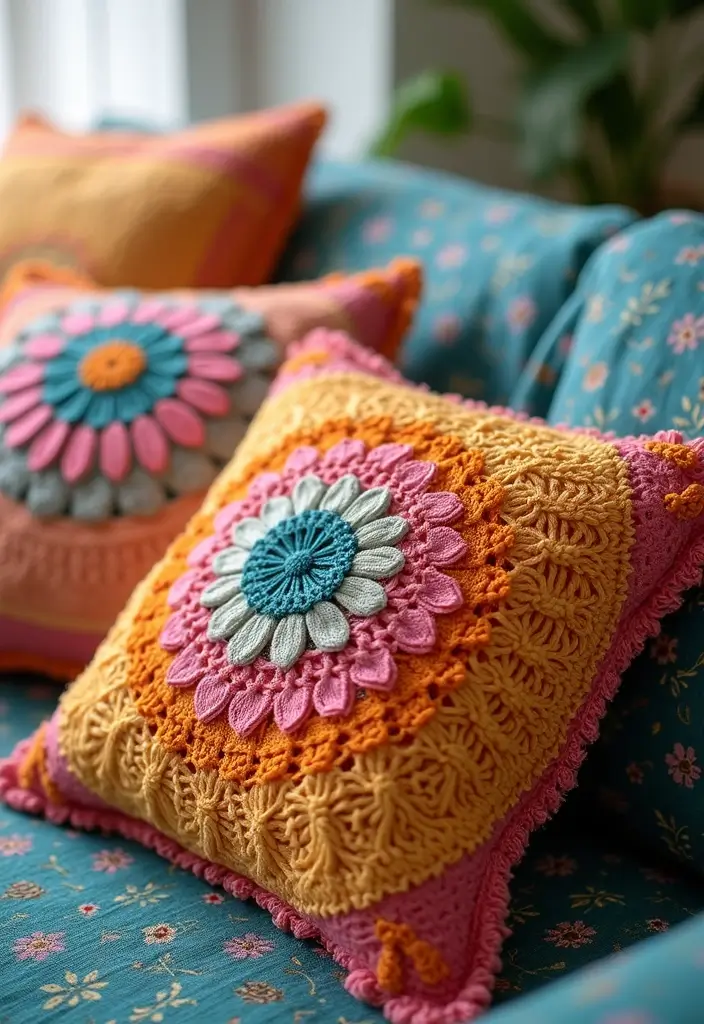
Revamp your living space with decorative pillow covers that you can easily make at home. If your old cushions are looking tired, this DIY project can breathe new life into them. Choose vibrant fabric patterns that match your personal style. You don’t need to be a sewing expert—iron-on fabric glue can work wonders for this project!
Let’s get started. First, measure your pillows to know how much fabric you’ll need. You can cut the fabric into shapes that fit your pillows perfectly. If you want to keep it simple, just fold the fabric around the cushion and secure it with glue.
Next, think about mixing textures. Pair soft velvet with crisp cotton or airy linen for a unique look. This combination not only adds depth but also makes your pillows more inviting.
Want to add some flair? Try attaching pom-poms or tassels to the edges. These little details can make your pillows pop!
Feeling creative? Use fabric markers to write fun quotes or doodle designs on the covers. This personal touch makes them truly yours.
Remember, the goal is to create something that reflects your taste while being simple enough for anyone to do. Grab your materials and let’s transform those old cushions into eye-catching decor!
Transform your space with DIY home decor – a simple fabric change can breathe new life into tired cushions! Get creative, and let your personal style shine through with every stitch!
Decorative Pillow Covers
Editor’s Choice

Fabric Glue Permanent, 60 ML Washable Clear Clothing Glue, Super Fabric …

Boho Fabric by The Yard Bohemian Wavy Upholstery Fabric Rainbow Embroide…

YYCRAFT 10 Yards Ball Fringe 1″ Wide Pom Pom Trim Ribbon Sewing-White
6. Hand-Painted Plant Pots
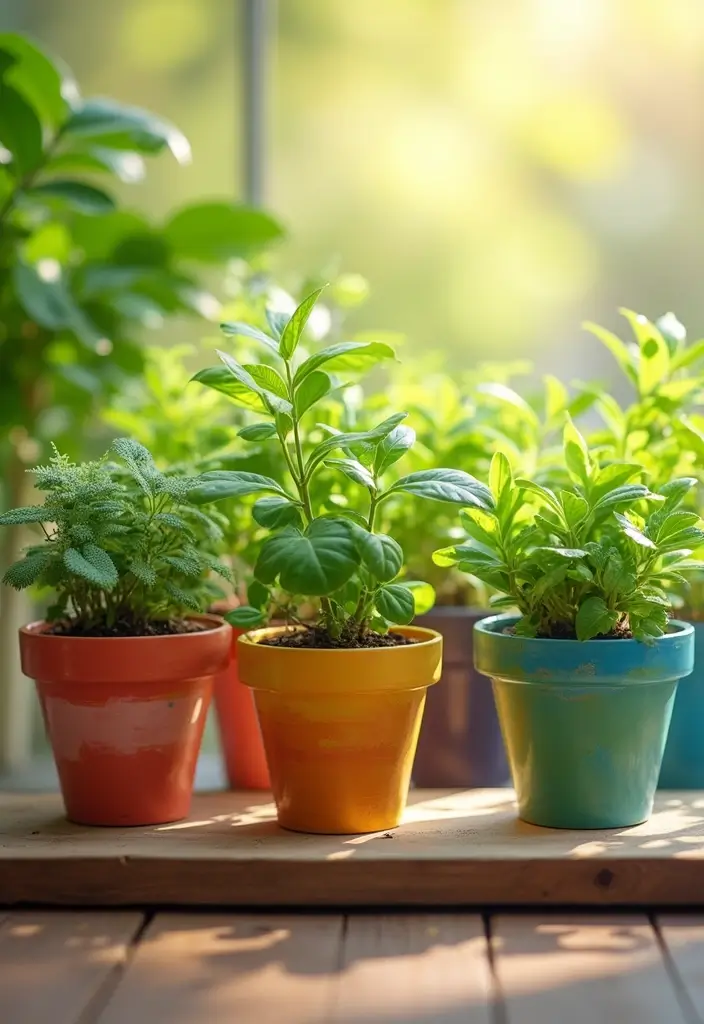
Brighten up your home with hand-painted plant pots! This simple DIY project brings color and personality to any space. Start with basic terracotta pots. These are affordable and easy to find at any garden center or craft store.
Now, grab some acrylic paints. Choose colors that make you smile. You can create vibrant designs, playful shapes, or even cute animal faces. If you have kids, let them join in! This activity is perfect for sparking their creativity. Give them brushes and let their imaginations run wild!
To make your pots pop, consider grouping them together. A collection of different sizes and designs can create a lively display on your windowsill or patio.
Once your artwork is complete, don’t forget to protect it. Use a clear spray sealant to guard against rain and sunlight, especially if you plan to put them outside. This step ensures your beautiful designs last longer.
So, gather your materials and start painting! You’ll have unique plant pots that reflect your style. Plus, you’ll enjoy the satisfaction of creating something special for your home. Your plants will love their new homes too!
Hand-Painted Plant Pots
Editor’s Choice
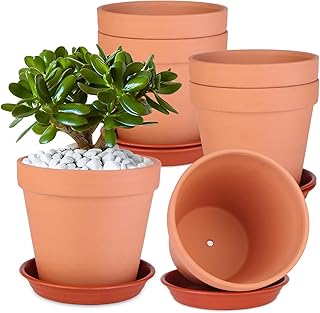
6 Pack 6 Inch Terracotta & Clay Pots with Saucer for Plants, Large Terra…
Acrylic Paint Set, 24 Colors (2 oz/Bottle) with 12 Art Brushes, Art Supp…
Rust-Oleum 249859 Painter’s Touch 2X Ultra Cover Spray Paint, Semi-Gloss…
7. Cozy Knit Throw Blanket
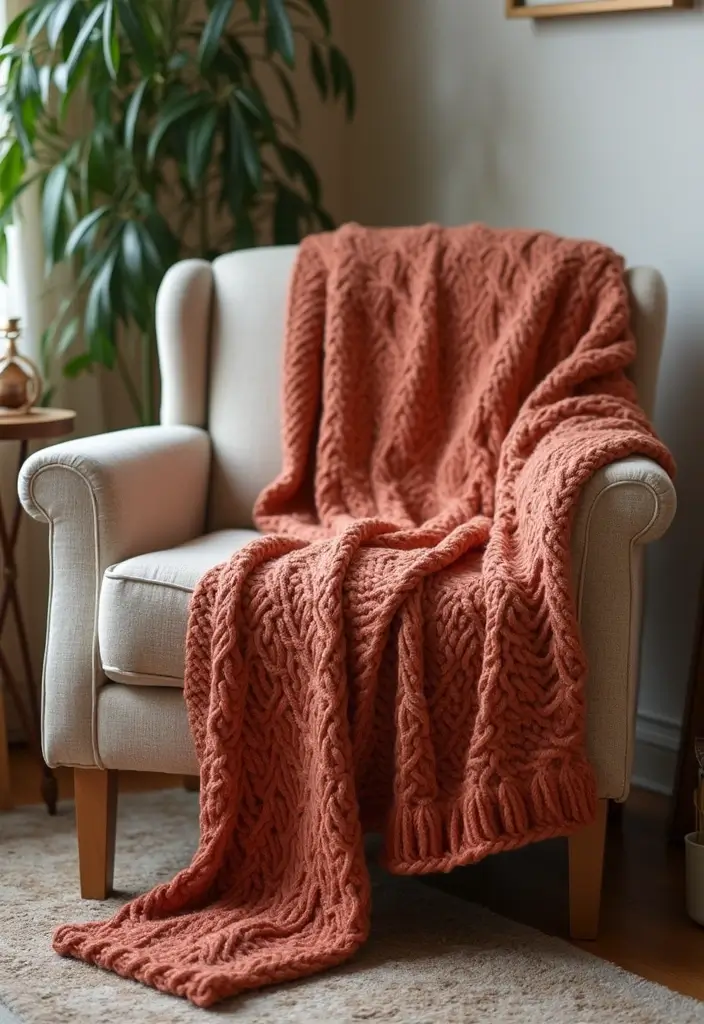
First, choose soft yarn that feels good against your skin. Look for colors that match your decor or add a splash of contrast. Think about warm tones like deep reds or earthy browns. These hues can make your room feel inviting.
If you’re new to knitting, don’t worry! You can start with simple stitches. Crochet is another great option if knitting feels too tricky. Many online tutorials are available, guiding you through basic patterns step by step.
Once you’ve finished your blanket, drape it over a chair or your couch. This not only looks appealing but also makes your living area feel cozier.
Want to get creative? Try mixing different yarns or colors. This adds a unique flair to your blanket.
In short, making a knit throw blanket is an enjoyable way to enhance your home. Plus, it’s a perfect project for all ages—your kids can join in too! Give it a try; you might find it’s more fun than you expected.
Cozy Knit Throw Blanket
Editor’s Choice

Lion Brand Yarn Feels Like Butta Yarn, Velvety-Soft Yarn for Crocheting …

36PCS Bamboo Knitting Needles Set, BetyBedy Single Pointed Knitting Need…

Crochet Hooks 12 Sizes Crochet Hook Set, 51 Pack Yarn Crochet Kit for Be…
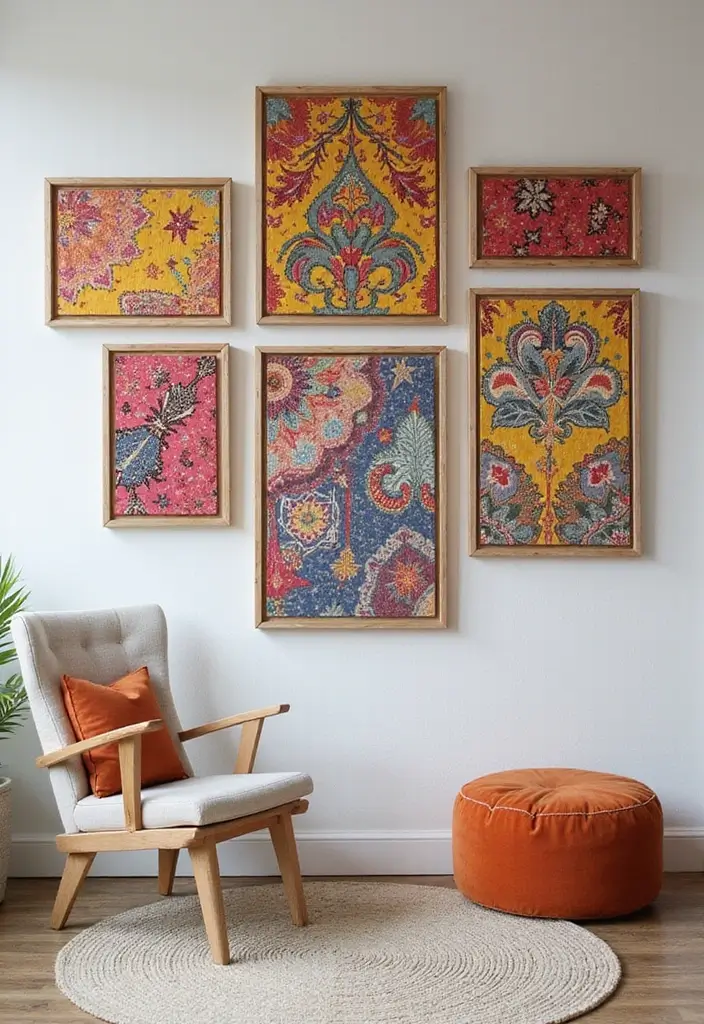
8. DIY Gallery Wall
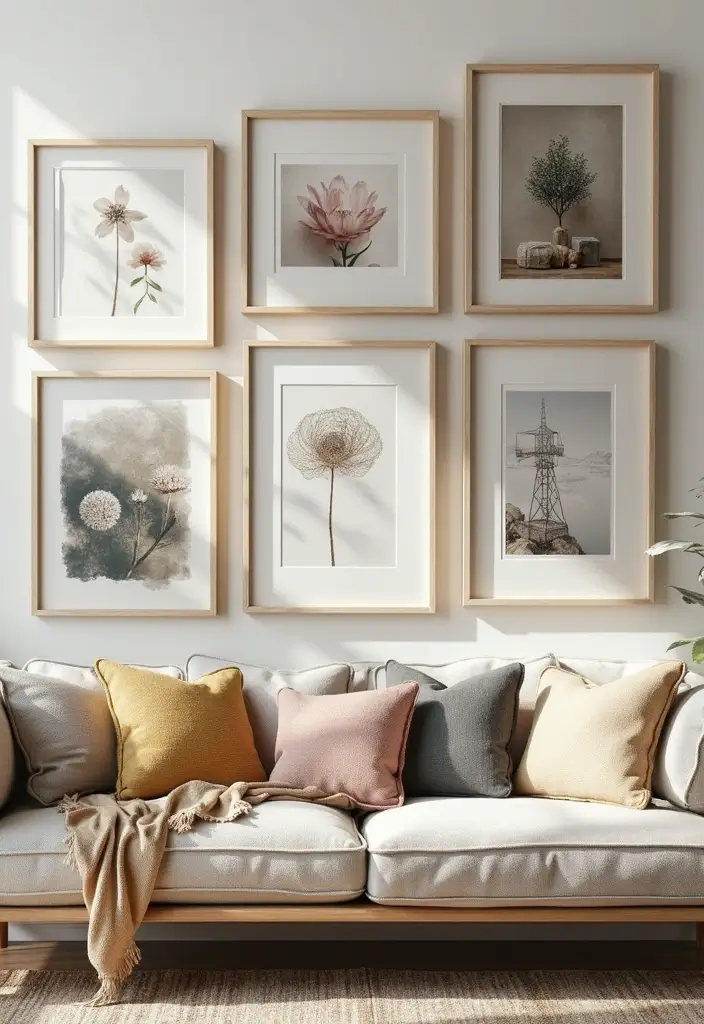
Creating a DIY gallery wall can be a fun way to showcase your personality and style. It turns a blank space into a conversation starter and adds warmth to your home. Plus, it’s a project anyone can tackle, even your kids!
Start by gathering a mix of items. Choose art prints, your own crafts, and cherished family photos. Aim for a variety of sizes and styles to make it visually interesting.
Next, pick a large piece to serve as the centerpiece. This could be a bold painting or a striking photograph. Arrange the smaller pieces around it to create balance.
Before you start hammering nails into the wall, lay everything out on the floor. This way, you can play with the arrangement and find the perfect layout. It’s also a great way to see how the colors and styles work together.
As you hang your pieces, remember to leave some space between them. This keeps the display from looking cluttered. A good rule of thumb is to maintain about 2-3 inches of space between frames.
Don’t worry if it doesn’t look perfect right away. You can always adjust the pieces as you go. The key is to have fun and make it a reflection of you and your family.
With these simple steps, your gallery wall will come to life, transforming your space into a unique art showcase.
DIY Gallery Wall
Editor’s Choice

eletecpro 12×12 Picture Frames Set of 9 with Mat for 8×8 Photos or witho…

dazongweihan 18 PCS Colorful Eclectic Wall Art Decor, Famous Artist Post…
Command 15 lb Large Picture Hanging Strips 14 Pairs (28 Command Strips),…
9. Vintage Ladder Display
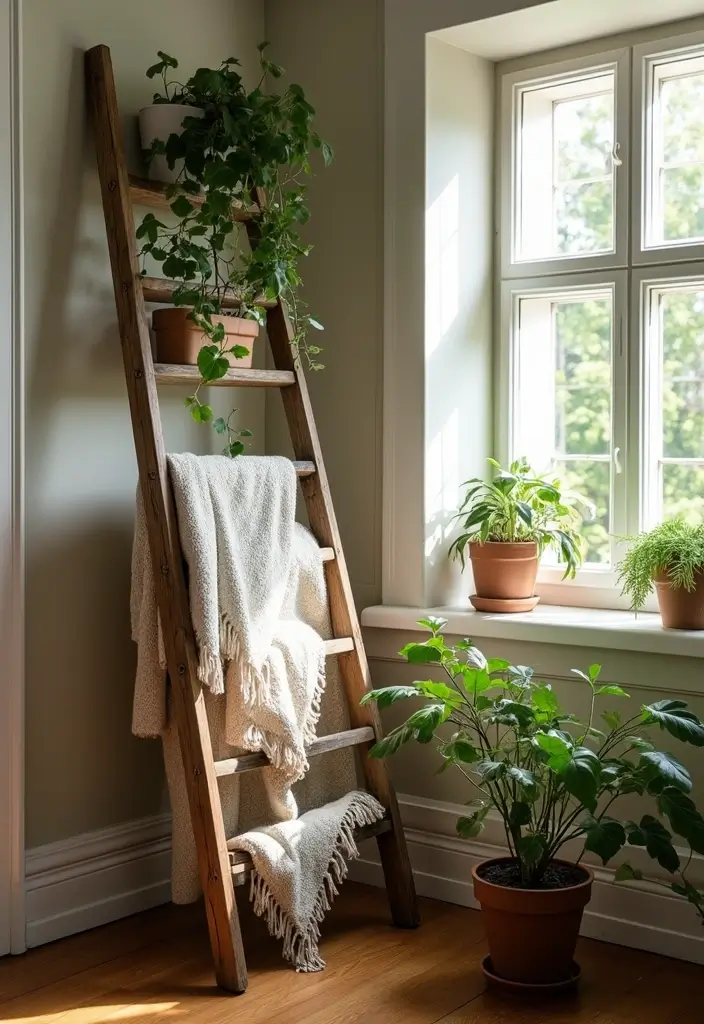
Transforming an old wooden ladder into a charming display piece is easier than you think. First, give it a good clean. If it’s looking faded, a fresh coat of paint can work wonders.
Next, lean it against a wall in your living room or bedroom. The rungs become perfect spots to showcase your favorite plants, colorful books, or cozy blankets. This not only adds style but also creates functional storage that keeps your space tidy.
Thinking about outdoor decor? This ladder can shine in your garden too! Use it to hold potted plants or even hang garden tools. The rustic look blends beautifully with nature.
Before setting it up, check if the ladder is steady. If it wobbles, secure it to the wall for safety. Place it in a corner or a less-used area to draw attention and add character to your home.
Quick Tips:
– Use the ladder to display seasonal decorations.
– Add fairy lights for a magical touch in the evening.
– Mix and match with other decor items for a personalized look.
Now, you’re ready to turn that forgotten ladder into a stunning focal point. Enjoy the process and see how it brings your space to life!
Vintage Ladder Display
Editor’s Choice

Rust-Oleum Linen White Chalked All-in-One Ultra Matte Paint | One Coat C…

6 Pack Fairy Lights Battery Operated – 7ft 20 Led Twinkle Lights 3 Modes…

Gepege 6 Inch Beaded Ceramic Planter Set of 2 with Drainage Hole and Sau…
10. DIY Candle Holders
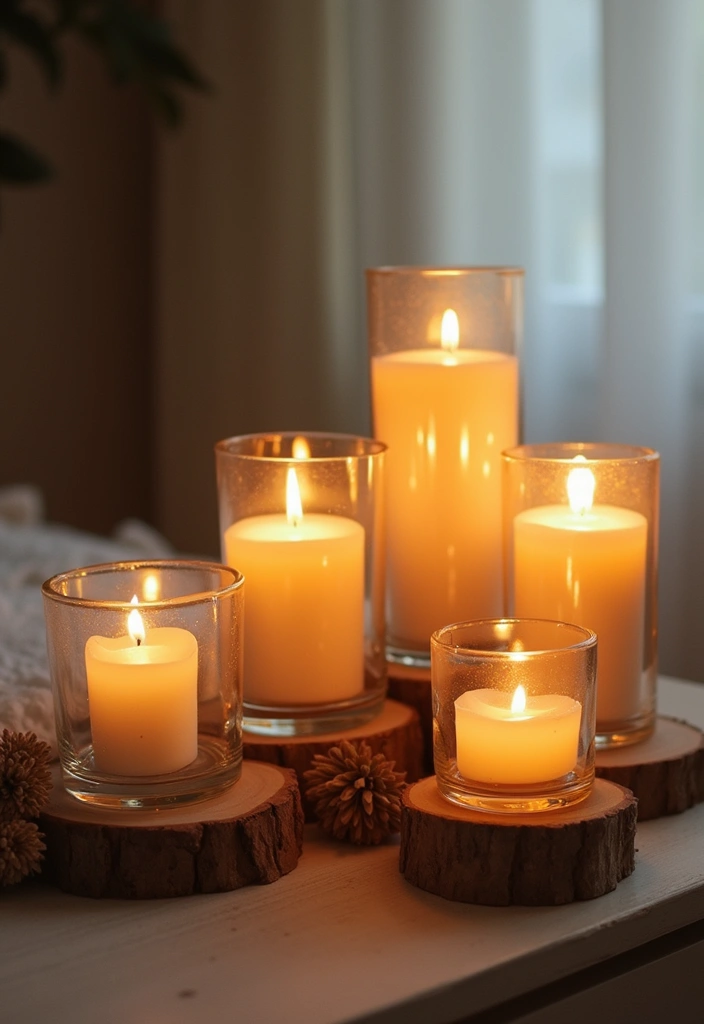
Creating your own candle holders is a fun and easy project that can brighten up any room. Plus, you can use materials you already have at home. Let’s dive into some simple ideas.
Glass Bottle Holders
If you have old glass bottles, this is a perfect project for you. Grab a few bottles and cut them to different heights. You can use a glass cutter for this. Once cut, smooth the edges with sandpaper.
Now, here’s where it gets exciting: paint the bottles in colors that match your home decor. Use acrylic paints for a quick dry time and vibrant colors. You can even add some glitter for a touch of sparkle!
Wooden Candle Holders
Wood is another great option. Find some leftover pieces of wood or branches. Cut them into slices, about 2 inches thick. Drill a hole in the center to fit your candles snugly.
You can leave the wood natural for a rustic feel, or stain it for a polished look. A little bit of varnish will protect the wood and enhance the color.
Clay Creations
If you’re feeling creative, try using air-dry clay. Mold it into fun shapes like animals or geometric designs. Once dry, paint them to add personality.
Stability Tips
For stability, add sand or pebbles to the bottom of your holders, especially if you’re using taper candles. This will keep them from tipping over.
These DIY candle holders not only bring warmth but also add a personal touch to your space. Gather your materials and start crafting today! You’ll love how they transform your home.
DIY Candle Holders
Editor’s Choice

Glass Cutter 2mm-20mm, Upgrade Glass Cutter Tool, Pencil Style Oil Feed …
Acrylic Paint Set, 24 Colors (2 oz/Bottle) with 12 Art Brushes, Art Supp…

Crayola Air Dry Clay (5lbs), Teacher Supplies, Natural White Modeling Cl…
11. Upcycled Furniture
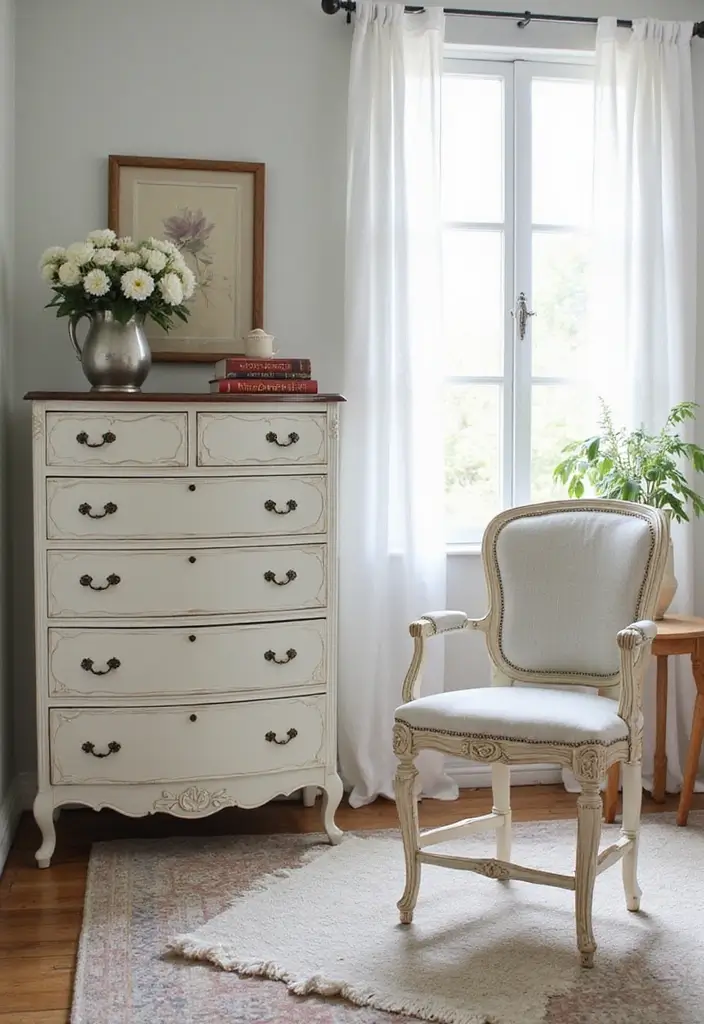
Is an old piece of furniture gathering dust in your home? Let’s breathe new life into it! Upcycling furniture isn’t just a fun project; it can also add character to your space without breaking the bank.
Start by looking at the piece you want to refresh. Perhaps it’s a tired dresser or a worn-out chair. Paint can work wonders. A bright, bold color can transform something dull into a stylish statement. Choose a hue that matches your room’s vibe.
Before you paint, prep your furniture. Sand the surface to create a smooth canvas. This step is essential for the paint to adhere well. Once sanded, apply a primer if needed, then go ahead with your chosen paint. After it’s dry, don’t forget to seal it. A good sealant protects your work and ensures it lasts.
If painting isn’t your style, consider reupholstering. Swap out the fabric on your chair or sofa for something fresh. You can even mix patterns for a trendy look. Just remove the old fabric, measure your new material, and staple it on.
Lastly, think about new hardware. Updating knobs or handles can instantly modernize a piece. Look for unique options that reflect your personality.
This process not only enhances your home but also allows you to express your creativity. So gather your tools and get started. Your home will thank you for it!
Upcycled Furniture
Editor’s Choice

ALL-IN-ONE Paint, Durable cabinet and furniture paint. Built in primer a…

House2Home 60 Inch x 3 Yard Upholstery Black Cambric Dust Cover Fabric R…

Romeda 18 Piece Drawer Hardware – Black 30mm Cabinet Knobs & Pulls for D…
12. DIY Wall Stencils

DIY wall stencils can breathe new life into your rooms without the hassle of wallpaper. If you want to add patterns or designs, stenciling is a fun and easy option. You can buy stencils or make your own with cardboard or plastic sheets.
Choose a design that matches your style. Think florals, geometric shapes, or even fun animal prints. The best part? You can create a stunning feature wall or add repeating patterns to smaller spaces like a hallway or bathroom.
Let’s get started! First, prepare your wall by cleaning it and applying a base coat of paint. Once it’s dry, position your stencil firmly against the wall. Use a sponge or a brush to dab paint through the stencil. Keep your strokes light to avoid paint bleeding under the edges.
If you’re unsure, start with lighter colors. They are more forgiving, and you can always go darker if you love the look. Always test on a small area first to see how it turns out.
Stencils are a fantastic way to refresh your decor as your tastes evolve. When you want a change, simply paint over the stencil work and start anew. It’s an easy and affordable way to keep your space feeling fresh and inviting. So grab your materials and let your creativity flow!
DIY Wall Stencils
Editor’s Choice

6-Piece Wildflower Stencil for Painting – Large Reusable Floral Design f…

Paint Sponge Applicator 3Pcs, Boyistar Black Detail Painting Sponge for …

55PCS Acrylic Paint Set of 36 Colors 2fl oz 60ml Bottles 12 Brushes,Non …
13. Fabric Bunting
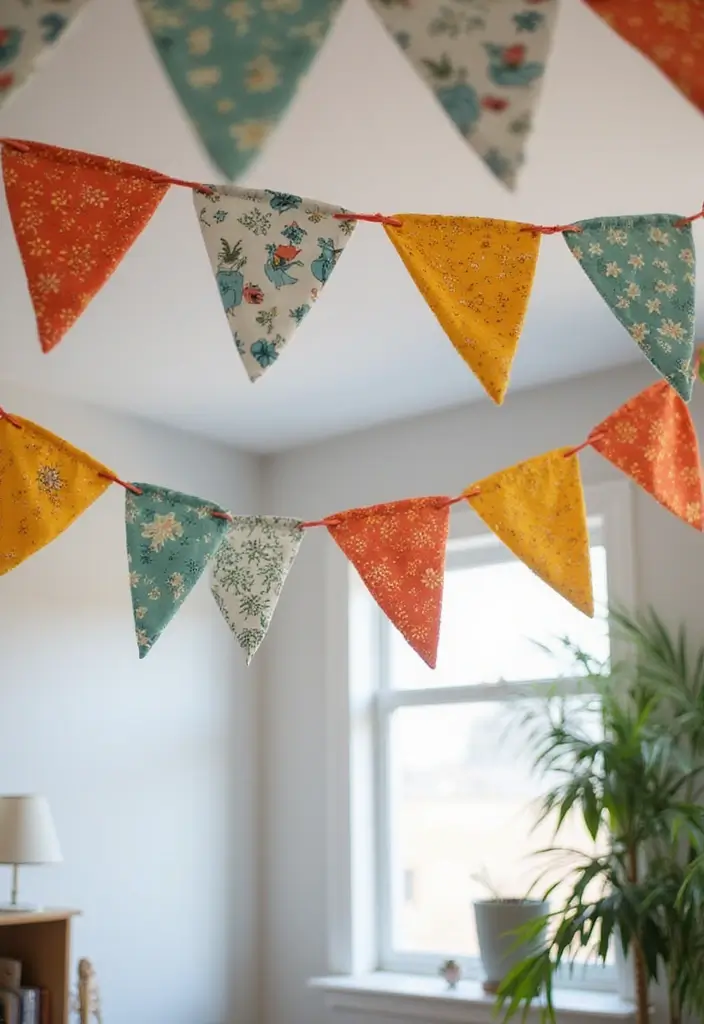
Want to add a splash of color to your space? Fabric bunting is the perfect solution! This fun DIY project is simple enough for you and your kids to tackle together. You’ll create eye-catching decorations that brighten up any room or event.
Start by gathering your materials. Choose a variety of colorful fabrics. Think about patterns like polka dots, stripes, or florals to mix things up. Cut these fabrics into triangle shapes. Each triangle should be about 6-8 inches long for a striking look.
Next, decide how you want to attach them. You can either sew them onto a ribbon or use fabric glue for an easier option. If you’re sewing, simply place the triangles along the ribbon, leaving a little space between each one. If you’re gluing, just stick them down securely.
Hang your bunting in a kid’s room for a playful touch, drape it over a party table, or add it to your living room for a festive vibe.
Tip: If you want a more coordinated look, pick fabrics that share a color palette or theme. This will make your bunting look professionally designed.
This project not only brightens your space but also gives your kids a chance to express their creativity. Let them choose their favorite fabrics and help with the cutting and gluing. You’ll make memories while creating something beautiful!
Now, grab those fabric scraps and get started on your own cheerful bunting!
Fabric Bunting
Editor’s Choice

42Pcs 10″x10″ Quilting Cotton Fabric Squares Sheets Pre-Cut Multi-Color …
Fabric Glue Permanent, 60 ML Washable Clear Clothing Glue, Super Fabric …

Coquimbo Sewing Kit Christmas Stocking Stuffers White Elephant Gifts for…
14. DIY Coasters
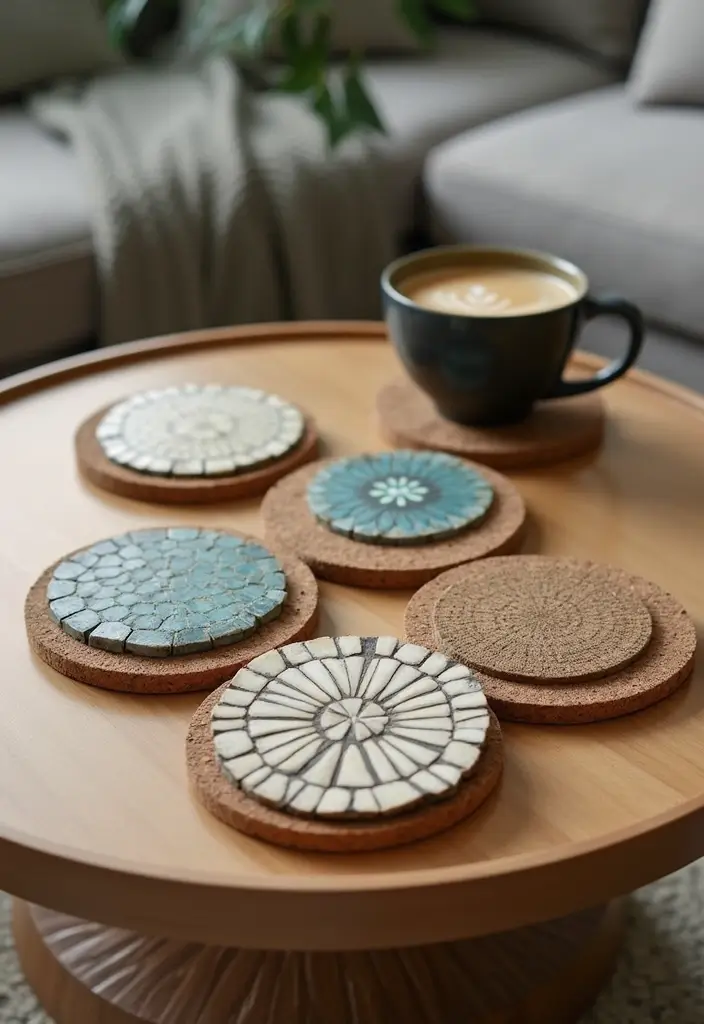
When you’re looking to add some flair to your home, DIY coasters are a fantastic choice. Not only do they protect your tables, but they also let you express your creativity.
You can make coasters from materials like cork, ceramic tiles, or even wood. If you have kids, this is a fun project to do together! Start by gathering your materials. You can find cork sheets at craft stores or use old tiles that you no longer need.
Next, think about your design. You can paint your coasters in your favorite colors, or even use decoupage to add pretty paper patterns or fabric. If you’re feeling adventurous, grab a wood-burning tool. This allows you to etch custom designs right into the wood, giving your coasters a personal touch.
Here’s a handy tip: always apply a waterproof sealant once your coasters are dry. This protects them from moisture and keeps them looking fresh.
These coasters can be great conversation starters. Imagine friends admiring your unique creations during a game night or a cozy coffee date. Plus, they make wonderful gifts!
So, gather your supplies and unleash your inner artist. You’ll enjoy creating something both beautiful and practical for your home.
Ready to dive in? Let’s get crafting!
DIY Coasters
Editor’s Choice

10 PCS Self-Adhesive Cork Sheet, 11.8 X 8.26 Inch Cork Sheet with Strong…

Craft Culture Wood Burning Tool Pen – Craft Burning Tools for Adults & T…

6-Pack New Type White Waterproof Sealant Mastic, Repair Sealing Clay, Qu…
15. DIY Plant Stand
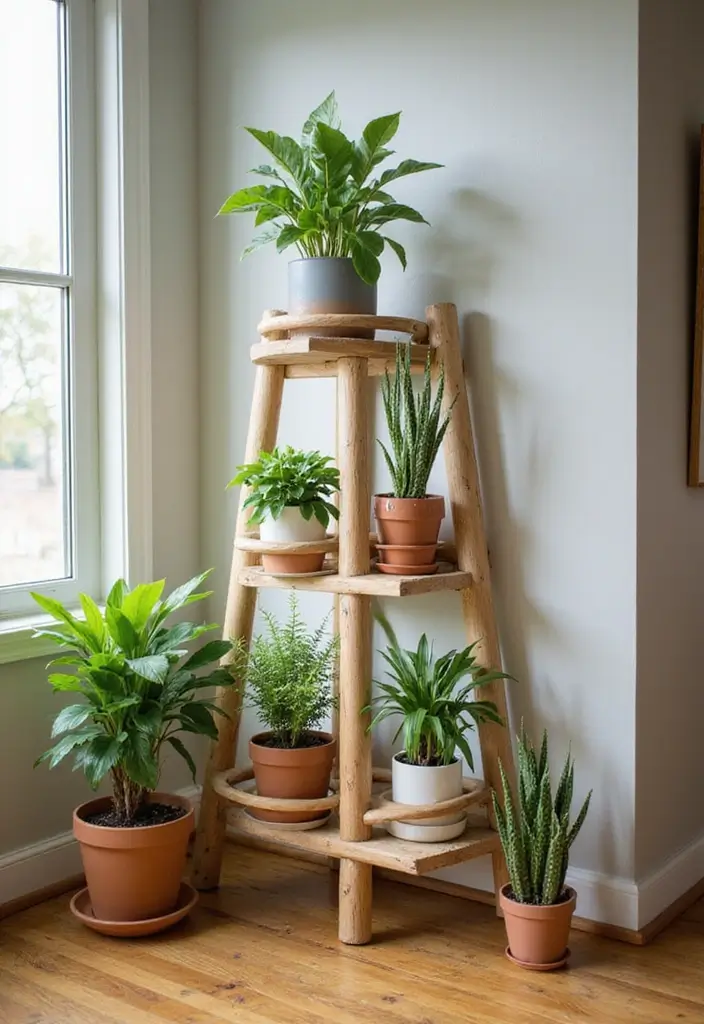
Create a stunning DIY plant stand that not only lifts your indoor plants but also adds flair to your home. This project is simple and can be completed in a weekend, making it perfect for anyone looking to spruce up their space.
First, consider your materials. You can use wood planks to build a multi-tiered stand or give new life to an old stool. If you go with wood, choose sturdy pieces that can support your plants. Sand the edges for a smooth finish, then decide on your style.
Want a bold look? Paint it a bright color that makes your plants pop. Or, if you prefer a more natural vibe, leave the wood unpainted for a rustic charm.
Before you get started, think about the design. How many plants do you want to display? Ensure the stand has enough levels for your collection.
Don’t forget about stability! Make sure the stand is strong enough to hold your plants without wobbling. If you want to move it around, consider adding wheels. This way, you can easily reposition your plants to catch the sunlight.
Incorporate this DIY plant stand into your decor and watch how it elevates not just your plants but your entire space. It’s a win-win for style and functionality!
Next, gather your tools and materials, and let’s bring your vision to life!
DIY Plant Stand
Editor’s Choice

Rustic Weathered Reclaimed Wood Planks for DIY Crafts, Projects and Deco…

Acrylic Paint Set of 12 Colors 2fl oz 60ml Bottles,Non Toxic 12 Colors A…

Bamworld Plant Stand Outdoor Rolling Tray Plant Caddy with Wheels 12in P…
16. Handwritten Quote Art
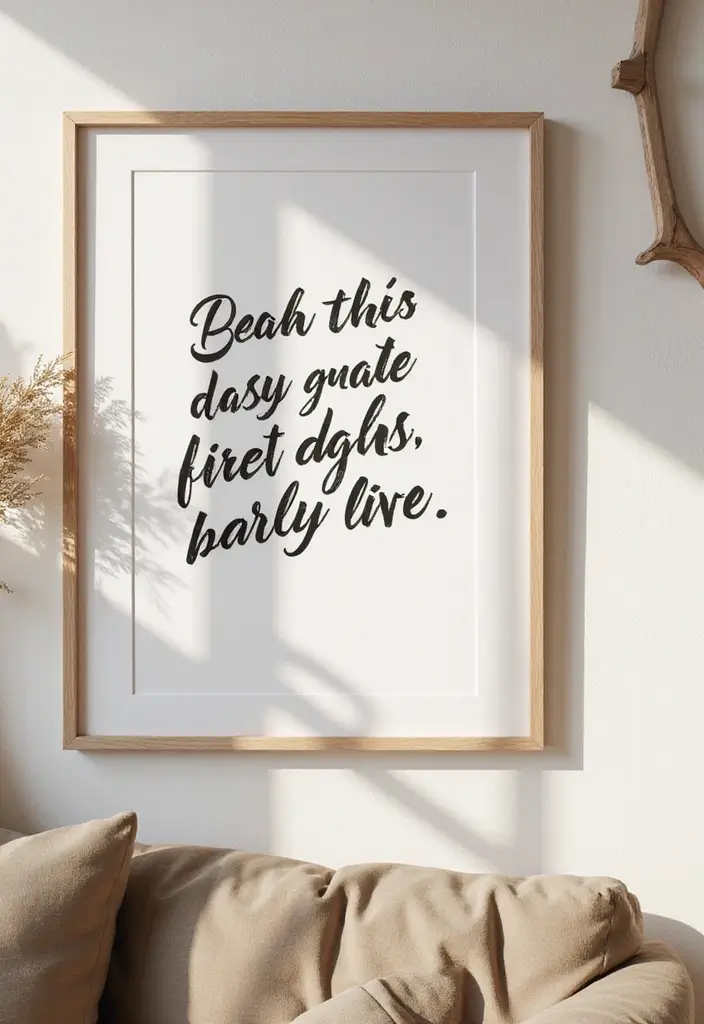
Are you looking to add a personal touch to your home? Creating handwritten quote art is a fantastic way to infuse your space with inspiration and character. This project is simple enough for anyone, even kids, to tackle.
Start by picking a quote that resonates with you. It could be a line from a favorite book, a motivational saying, or a phrase that makes you smile. Grab a canvas or some high-quality paper to get started.
Next, practice your lettering style on scrap paper. This will help you feel confident when you write on the final piece. Don’t worry about making mistakes; they can lead to unique designs!
Once you’re comfortable, write out your quote neatly. To make it pop, use colors or doodles. Try adding:
– Color blocks behind the text
– Simple illustrations that reflect the quote
– Fun borders or patterns around the edges
This approach not only beautifies your space but also serves as a daily reminder of positivity. Hang your art in a spot where you can see it often, like your bedroom or home office.
So, roll up your sleeves and let your creativity flow! This project is a delightful way to enjoy art while making your home feel more like you. Plus, it’s a wonderful activity to share with your kids. They’ll love seeing their work showcased on the wall!
Handwritten Quote Art
Editor’s Choice

KEFF 24-Pack Canvas for Painting, 6 of 5×7, 8×10, 9×12,11×14 Painting Ca…

ZENO 72 Dual Tip Markers Set with Case – No-Bleed Coloring Markers for A…

40 Rolls Washi Tape Set – 15 mm Wide Colored Masking Tape for Kids, Deco…
17. DIY Kids’ Art Display
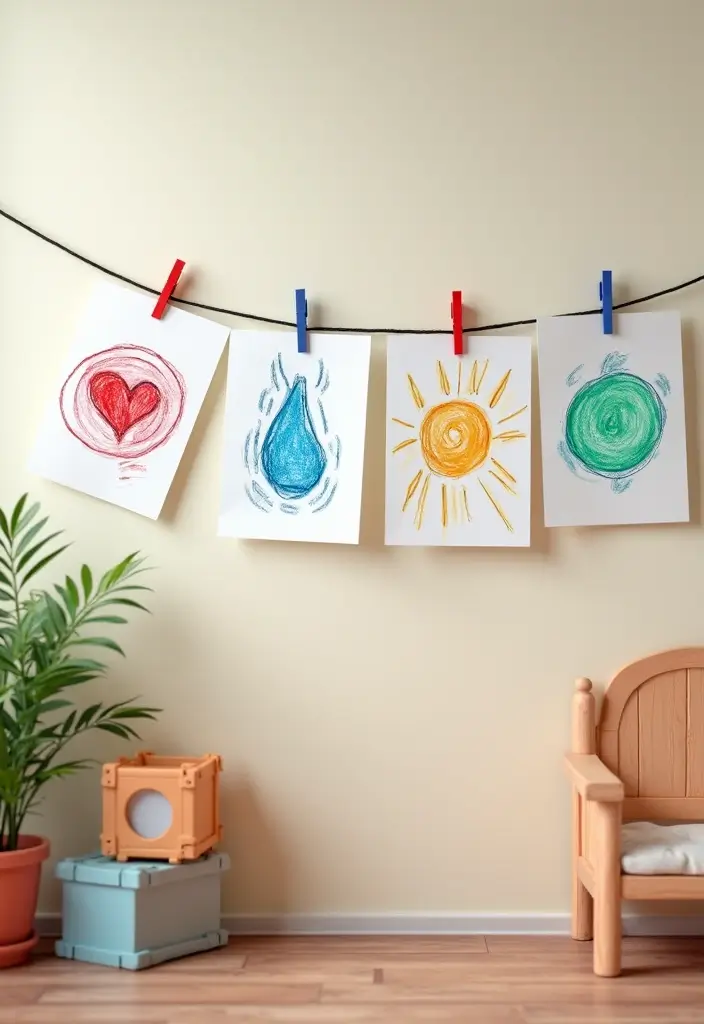
Create a special spot in your home to celebrate your kids’ creativity with a DIY art display. This project is not just fun; it also boosts your child’s confidence and pride in their work.
Start by deciding where to hang the display. A wall or a bulletin board works great. You can use simple wire or string to create a line across the space. Next, grab some clips or clothespins. These will hold their latest drawings and paintings.
Here’s why this is a great idea: It allows your kids to showcase their art. They can easily swap out old pieces for new ones, keeping the display fresh and exciting. You could even set a regular schedule for changing the artwork, like every month or after a family outing.
Let your kids take charge of the arrangement. Give them the freedom to choose how to hang their creations. This involvement makes the project even more special. Encourage them to mix it up. They might want to layer smaller pieces over larger ones or create a themed section for holidays.
Next steps: Gather materials like string, clips, and a hammer for nails. It’s a quick project that won’t take much time. Plus, you’ll have a colorful display that adds a personal touch to your home. Enjoy the creativity and the smiles it brings to your kids’ faces!
DIY Kids’ Art Display
Editor’s Choice


PerkHomy Natural Jute Twine 600 Feet Long Twine String for Crafts Gift W…

U Brands Cork Bulletin Board, 18″ x 24″ Inches, Light Birch Wood Frame (…
18. Painted Wood Blocks
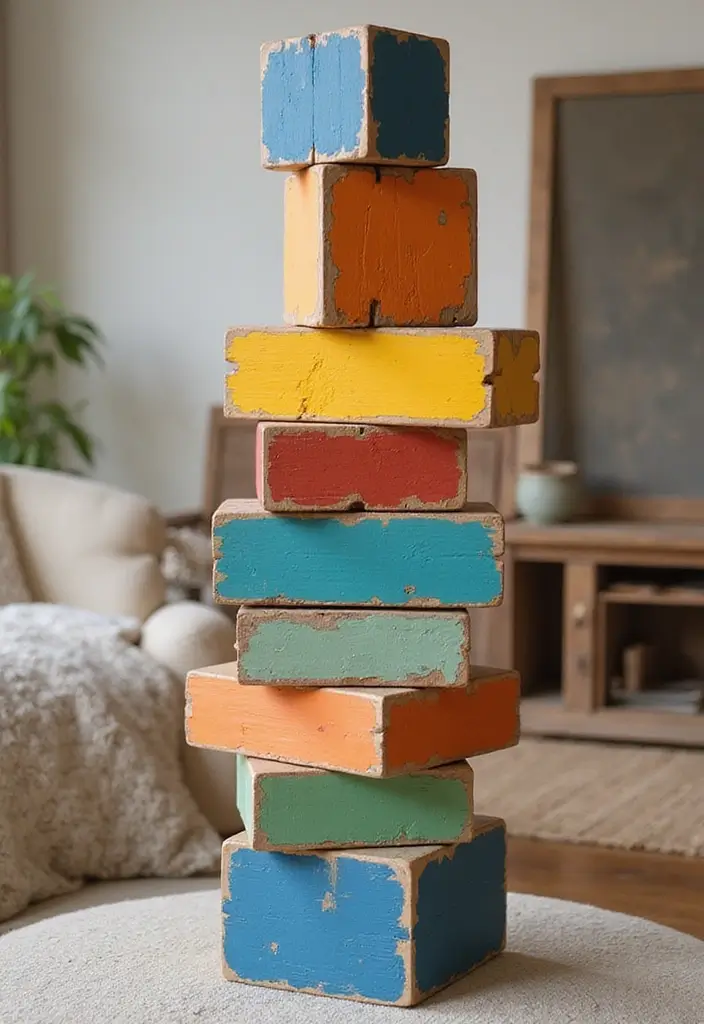
Want to add some fun and creativity to your home? Painted wood blocks are a fantastic project that can brighten any space. You can turn simple scrap wood into colorful decor or even educational toys.
Start by gathering your materials. Look for pieces of wood you might have lying around. They can be any shape or size. Next, grab some paint in bright, playful colors. Let your imagination run wild! You can create patterns like stripes, polka dots, or even simple designs like stars and hearts.
Once your blocks are painted, you have endless possibilities. Kids can stack them for fun tower-building games. You can display them on shelves or use them to spell out words, names, or inspirational phrases. This adds a personal touch to your decor.
If you plan to use these blocks as toys, make sure to seal them with a clear coat. This step keeps the paint safe and ensures they last longer, especially if little hands will be playing with them.
This project isn’t just easy; it’s also customizable. You can create a modern look with sleek colors or go for a rustic vibe with earthy tones. The choice is yours!
So, roll up your sleeves, gather your supplies, and let your creativity shine with painted wood blocks. You’ll love the unique touch they bring to your home!
Painted Wood Blocks
Editor’s Choice
Acrylic Paint Set, 24 Colors (2 oz/Bottle) with 12 Art Brushes, Art Supp…

Unfinished Wooden Cubes,Pack of 50 Wood Blocks for Crafting,1 Inch Wood …
Rust-Oleum 249859 Painter’s Touch 2X Ultra Cover Spray Paint, Semi-Gloss…
19. DIY Photo Frames
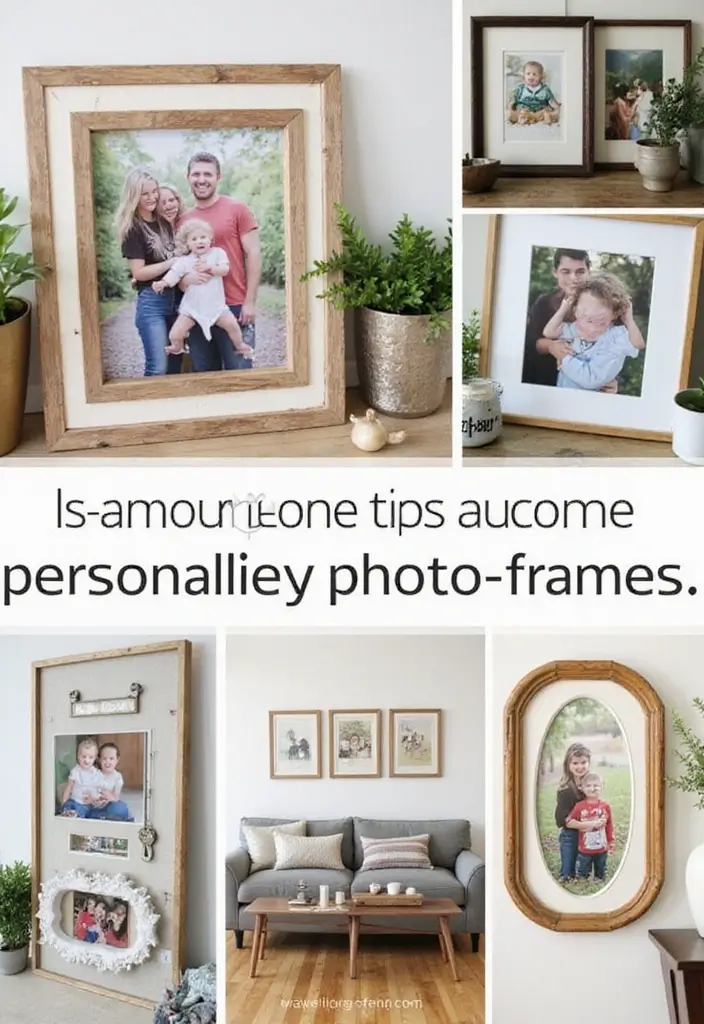
You want to display your cherished memories in a fun and creative way. DIY photo frames are the perfect solution! Not only do these frames let you showcase your favorite pictures, but they also add a personal touch to your home.
Start by gathering materials you already have around the house. You can use twigs for a rustic look, cardboard for a simple base, or even lace for a touch of elegance. If you prefer color, grab some paint and let your artistic side shine.
Here’s a quick guide to get you started:
1. Choose Your Base: Decide whether you want a sturdy frame from cardboard or a lighter one made from twigs.
2. Add Personal Touches: Use paint, washi tape, or fabric to decorate your frame. This customization helps coordinate the frame with your room’s decor.
3. Get Creative: Mix and match different materials. Combine painted cardboard with natural twigs for a unique gallery wall setup.
4. Display with Style: Hang your frames on the wall or place them on a shelf. Create a mini gallery by grouping several frames together.
These DIY photo frames are perfect for all ages. Kids can help, too! They’ll enjoy decorating and personalizing their own frames. Plus, it’s a great way to spend time together.
Now, go ahead and turn your memories into art that brightens your space! You’ll love how these simple projects can make your home feel more inviting and personal.
Transform your favorite memories into art! DIY photo frames let you showcase your cherished moments while adding a personal touch to your home. Grab some twigs or paint and let your creativity shine!
DIY Photo Frames
Editor’s Choice
Acrylic Paint Set, 24 Colors (2 oz/Bottle) with 12 Art Brushes, Art Supp…

Washi Tape Set 30 Rolls, Decorative Tape, Colored Tape, Scrapbook Tape, …

VILLCASE Craft Sticks, 50Pcs Wood Twigs for Crafts 7.8″ and 12″ Wood Log…
20. DIY Wall Clock
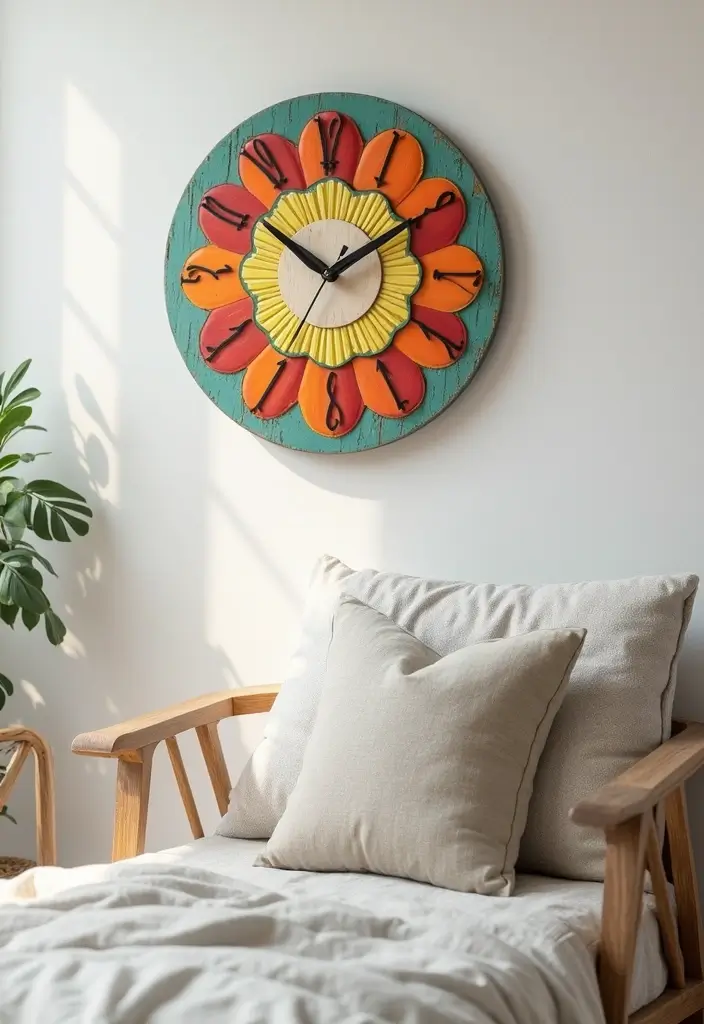
Creating a stunning DIY wall clock is simpler than you might think. Not only does it help you keep track of time, but it also adds a personal touch to your home decor. Here’s how to make one that reflects your unique style.
Start with a solid base. A wooden board works perfectly. You can find one at a craft store or repurpose an old piece of wood. This base will be the canvas for your masterpiece.
Next, you’ll need clock movements. You can easily purchase these online or at local craft stores. They usually come with everything you need to get started, including clock hands and numbers.
Now, let your creativity shine! Decorate the base with paint, fabric, or stickers that match your home’s theme. If you’re unsure where to start, consider using stencils for the numbers. This will keep them neat and uniform.
Before you drill holes for the clock movements, hold the clock up on the wall to find the perfect spot. This step ensures you don’t make unnecessary holes.
Remember, a wall clock is more than just a timepiece; it’s a statement. Make it fun, and don’t hesitate to involve your kids in the process. They’ll love painting and crafting alongside you!
With this project, you’ll have a stylish addition to your home and a fun activity to enjoy. So gather your materials and get started on your one-of-a-kind wall clock today!
DIY Wall Clock
Editor’s Choice


2Pcs Quartz Clock Mechanism Kit, Wall Clock Mechanisms Mattery Powered R…

4 Inch Number Stencils Set Plastic Number Stencil Reusable Digital Templ…
21. Seasonal Wreaths
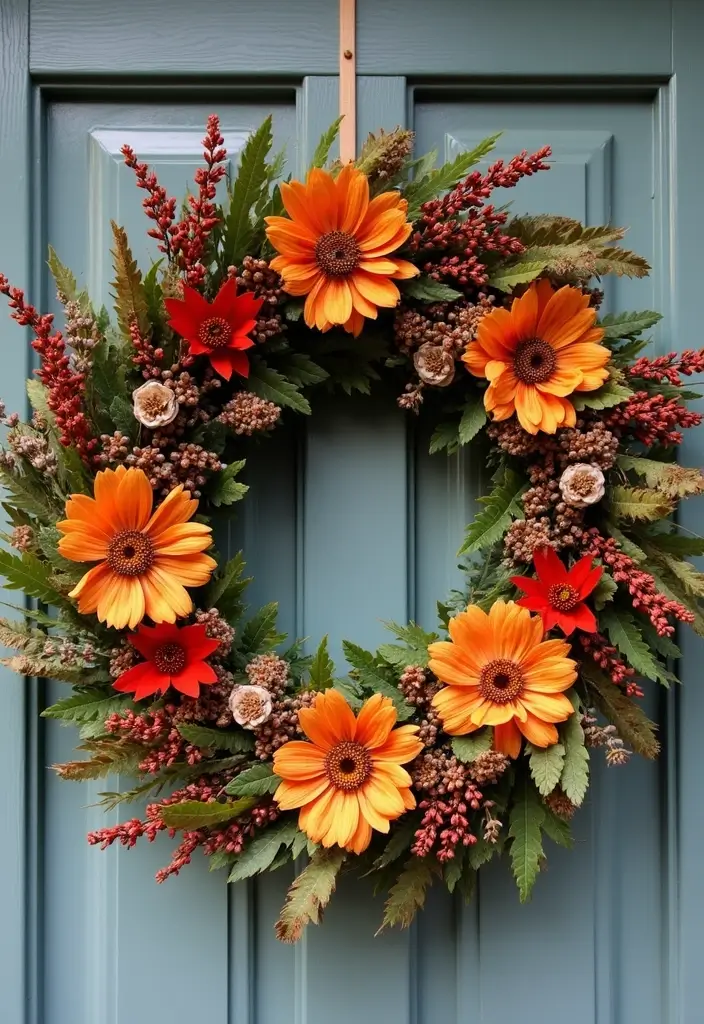
Create your own seasonal wreaths to brighten up your front door! This simple project lets you change your home’s look with the seasons. You can use materials like twigs, faux flowers, or even seasonal decorations to make it uniquely yours.
Start by gathering materials. Why not take your kids on a nature walk? They can collect pinecones, colorful leaves, or small branches. This not only personalizes your wreath but also makes for a fun family outing.
Next, let’s get crafting! Grab a sturdy wire frame or a foam base. Arrange your collected items on the frame. Play with colors and textures to make it pop! Use a hot glue gun for quick sticking. It’s perfect for making sure everything stays in place.
Once you’re happy with your design, finish your wreath by sealing it. This step is crucial for outdoor durability. Use a clear sealant spray to protect your masterpiece from the elements.
Hang your wreath on the door and watch how it brightens up your entrance. You’ll love how it welcomes guests with a fresh seasonal vibe. Plus, changing it up throughout the year brings new life to your home.
So gather those supplies and get started on this fun, creative project today!
Seasonal Wreaths
Editor’s Choice

Gorilla Mini Hot Glue Gun Kit (Pack of 1 Mini Hot Glue Gun and 30 Sticks…
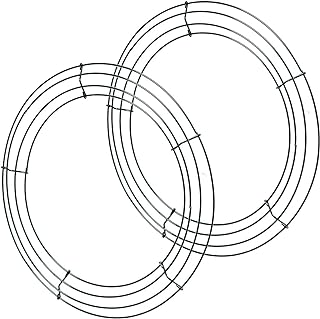
KBHOME 2 Pieces 14 inch Metal Wire Wreath Form Frame Dark Green Ring for…
Rust-Oleum 249859 Painter’s Touch 2X Ultra Cover Spray Paint, Semi-Gloss…
22. Upcycled Tin Can Lanterns
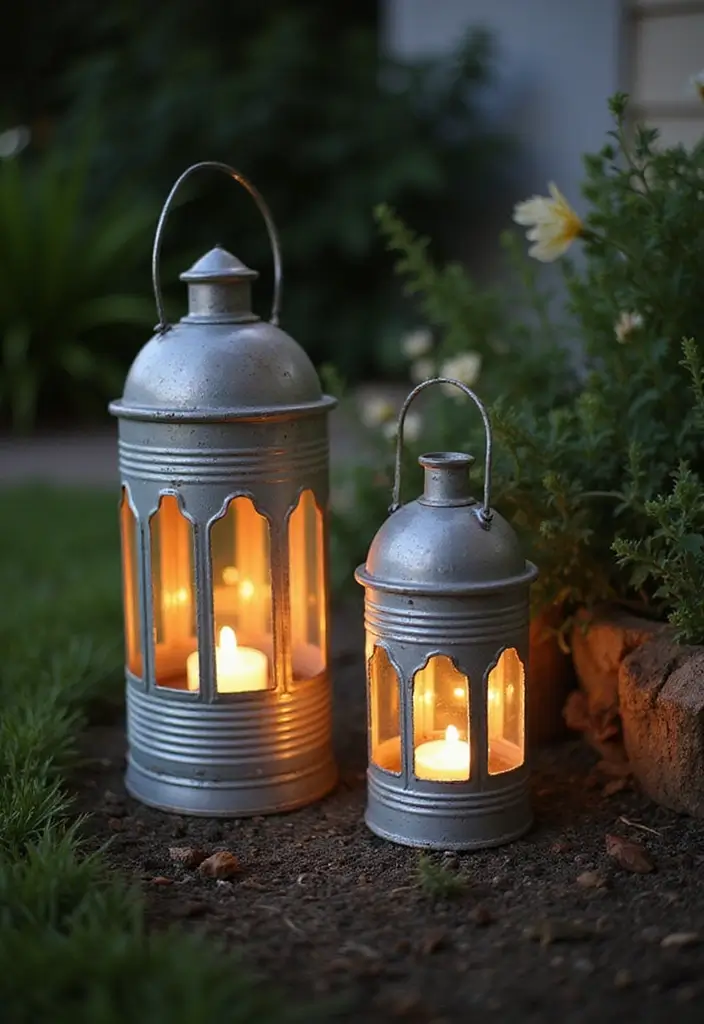
Turn your old tin cans into stunning lanterns! This fun DIY project not only brightens your outdoor space but also gives new life to items that would otherwise go to waste. Here’s how you can make your own tin can lanterns.
First, fill your cans with water and freeze them overnight. This will solidify the water and make it easier to create your lantern designs.
Once frozen, take the can out of the freezer, and let it sit for a few minutes. Use a hammer and a nail to punch holes into the can, creating patterns or shapes. You can make stars, hearts, or any design you like! Just remember to be careful; the edges can be sharp.
After finishing the design, remove the ice and rinse the can. Now, place a tea light inside. When you light it, the glow will shine beautifully through your designs, adding a magical touch to your garden or patio.
Customize your lanterns for any occasion! Use different can sizes for varied heights and effects. You can paint them, wrap them with twine, or even add seasonal decorations like leaves or flowers.
This project is great for kids, too. Just supervise them while they handle tools and sharp edges. Enjoy crafting these delightful lanterns, and watch your outdoor space come alive with light and charm!
Upcycled Tin Can Lanterns
Editor’s Choice

IRWIN Hammer, Fiberglass, General Purpose, Claw, 16 oz. (1954889)

Acrylic Nail Kit for Beginners with Everything Nails Kit Acrylic Set wit…

Stonebriar Unscented Long Burning White Tealight Candles, Bulk Pack, 6-7…
23. DIY Garden Markers
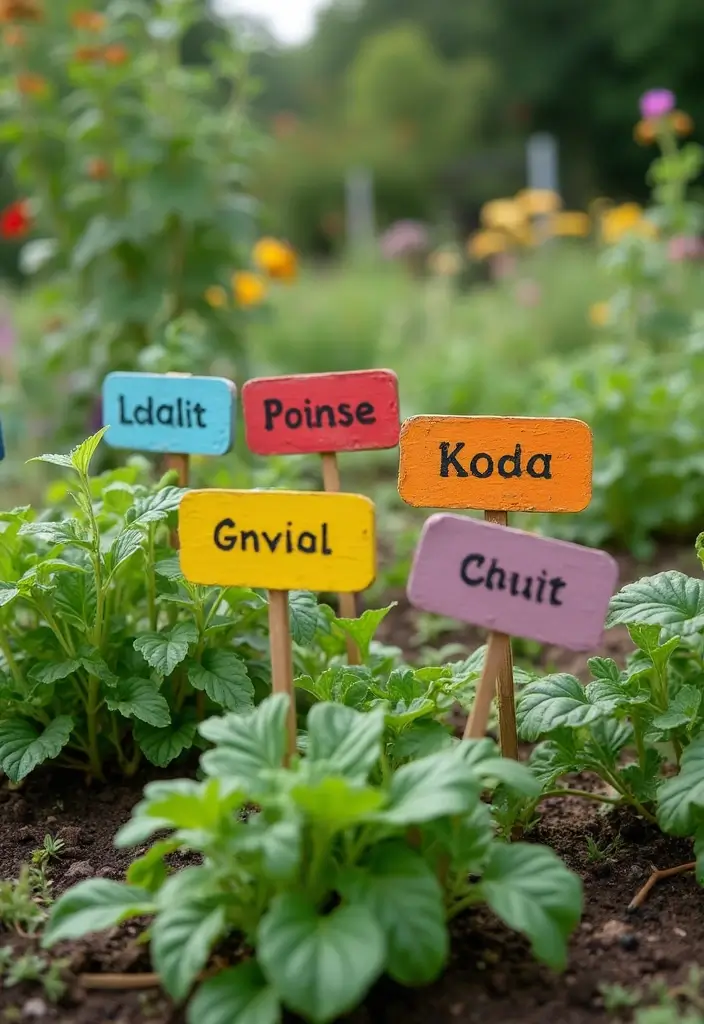
Are you looking to add a personal touch to your garden? DIY garden markers are a fun and creative way to label your plants while keeping everything organized. You can use simple materials like wooden spoons, stones, or even skewers. This project is not only easy but also a colorful addition to your outdoor space.
Here’s how to get started:
1. Choose Your Materials: Grab some wooden spoons or smooth rocks. You can also use old skewers for a more rustic look.
2. Get Creative: Use paint or permanent markers to write the names of your herbs and veggies. Let your imagination run wild! You can draw little pictures or add colorful designs.
3. Make It Last: Use weather-resistant paint or a clear sealant to protect your markers. This way, they will survive rain and shine for many seasons.
Involving your kids in this project adds extra joy. They will love painting and learning about the plants they help care for.
As you create your garden markers, think about your garden’s theme. You might want to match colors or styles.
This simple project brings organization and fun to your garden. Plus, it helps your kids learn about nature and gardening. Why not give it a try? You’ll enjoy the process and the bright, personalized touch it adds to your garden!
DIY Garden Markers
Editor’s Choice

Magicfly Outdoor Acrylic Paint, Set of 30 Colors/Tubes (60 ml, 2 oz.) wi…
Rust-Oleum 249859 Painter’s Touch 2X Ultra Cover Spray Paint, Semi-Gloss…

Mr. Pen – Wood Plant Labels with Marker, 100 Pcs, 6″ Wooden Plant Markers
24. DIY Table Centerpieces
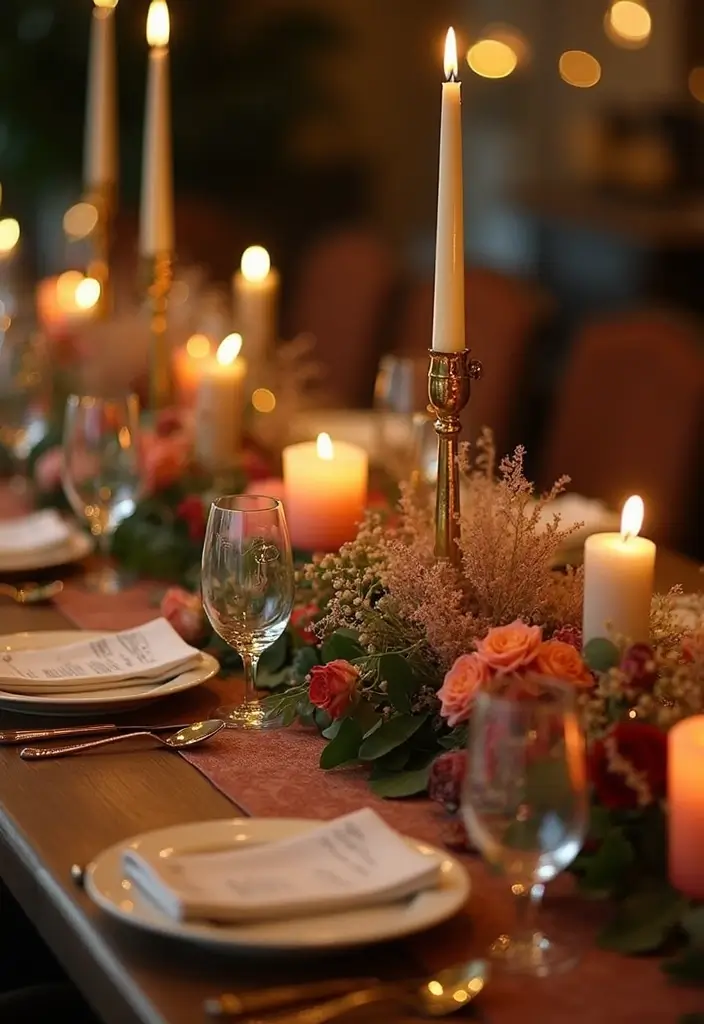
Looking to add a touch of charm to your dining table? DIY table centerpieces are a fun and easy way to elevate your space. You don’t need fancy materials. Just gather some simple items from around your home or a nearby store.
Start with a bowl or a vase. Fill it with candles, fresh flowers, or even decorative stones. Consider seasonal themes! For spring, use bright blooms; for fall, think about small pumpkins or pinecones. You can also create a tiered tray. This allows you to display multiple items at different heights, creating an eye-catching arrangement.
Keep your centerpieces low. This ensures everyone can see and talk to each other without straining. You want your table to feel inviting, not cluttered.
Change your centerpieces with the seasons to keep things fresh. This not only spruces up your dining experience but also gives you a fun project to look forward to.
Want to make it even easier? Involve your kids! Let them pick the items and help arrange them. This can turn into a delightful family activity.
So, gather your materials and get started. Your table will thank you, and your meals will feel more special than ever!
Transform your dining experience with a simple DIY table centerpiece! Gather everyday items and let your creativity shine—your table deserves a touch of charm!
DIY Table Centerpieces
Editor’s Choice

Decorative Concrete Fruit Bowl For Kitchen Counter Or Table Decor – Prem…

Mfacoy 3 Tier Serving Tray Set, 12″ Tiered Serving Trays Platters, Reusa…

Amagic 2000 Pieces Artificial Rose Petals with 24 Heart LED Tea Lights C…
25. DIY Memory Jar
Wrap up your DIY home decor adventure with a heartfelt project: the DIY Memory Jar. This simple yet meaningful creation allows you to collect your favorite moments and future goals in one beautiful space.
Start with a jar—any clear container will do. Then, let your creativity flow! You can paint it, stick on fun stickers, or wrap fabric around it. Think of colors and designs that reflect your family’s personality.
Next, gather some colorful paper or simple notecards. Each family member can write down memories, dreams, or even daily highlights. It’s a great way to capture those fleeting moments that often slip away.
Make this a regular family ritual. Set aside time each week or month to add new notes. You could even encourage your kids to decorate their own little slips of paper.
Don’t forget to revisit the jar together! Open it up at the end of the year or during holidays. Reflecting on these memories can spark laughter and joy, reminding everyone of the good times shared.
This project is not just a decoration; it’s a treasure trove of your family’s journey. So grab that jar and start filling it with memories today!
DIY Memory Jar
Editor’s Choice

Glass Regular Mouth Mason Jars, 16 oz Clear Glass Jars with Silver Metal…

300PCS Colored Index Cards, 3×5 Inch Flash Cards Study Heavy Notecards f…

3228pcs Gems Stickers, Self Adhesive Rhinestone Jewel Stickers, Acrylic …
Conclusion
There you have it—25 easy DIY home decor projects that can truly transform your space! Each project not only enhances the beauty of your home but also allows you to express your personality. Plus, many of these projects are fun for the whole family, inviting creativity and collaboration.
Which project are you excited to try first? Embrace your creativity and make your home reflect who you are!
Note: We aim to provide accurate product links, but some may occasionally expire or become unavailable. If this happens, please search directly on Amazon for the product or a suitable alternative.
This post contains Amazon affiliate links, meaning I may earn a small commission if you purchase through my links, at no extra cost to you.
Frequently Asked Questions
What Are Some Easy DIY Home Decor Projects Beginners Can Start With?
If you’re new to DIY home decor, you’re in luck! There are plenty of easy projects that anyone can tackle, like creating your own wall art or repurposing old furniture. For instance, try upcycling glass jars into stylish vases or using fabric scraps to make unique throw pillows. These projects are not only fun but also budget-friendly, allowing you to transform your space without breaking the bank!
How Can I Make DIY Home Decor Projects More Budget-Friendly?
Great question! To keep your DIY home decor projects budget-friendly, start by utilizing materials you already have at home. Thrift stores and garage sales are also treasure troves for finding inexpensive supplies. Consider swapping materials with friends or family, and don’t be afraid to get creative with what you have! Remember, the goal is to have fun and express your style without overspending.
Are DIY Home Decor Projects Suitable for Kids?
Absolutely! Many DIY home decor projects are perfect for kids, promoting creativity and teamwork. Projects like making colorful paper garlands or painting flower pots can be fun and engaging activities for children. Just ensure you choose projects that are safe and appropriate for their age. With a little guidance, even your kids can help you create beautiful decor that reflects your family’s personality!
What Essential Tools Do I Need for DIY Home Decor Projects?
Having the right tools can make your DIY home decor projects a breeze! Start with some basics, like a hot glue gun, scissors, and a craft knife. A good set of paintbrushes and a sturdy cutting mat are also essential. As you progress, you might want to invest in a drill or a sewing machine for more advanced projects. Remember, you don’t need everything at once; build your toolkit as you go!
How Can I Find Inspiration for My DIY Home Decor Projects?
Inspiration is everywhere! Browse through social media platforms like Pinterest and Instagram for endless DIY home decor ideas. You can also check out home improvement blogs or magazines. Don’t forget to visit local craft stores for displays that might spark your creativity. And remember, your own space can be a canvas; think about what you love and how you can bring that into your decor!
Related Topics
DIY home decor
easy projects
budget friendly
family activities
beginner friendly
quick transformations
creative upcycling
seasonal decor
minimalist style
colorful accents
home improvement
kid-friendly crafts